FLUX rear light – moving from saddle to rackUpdated 5 months ago
Mounting the FLUX rear light to the optional rear rack
1. Prepare the rear light
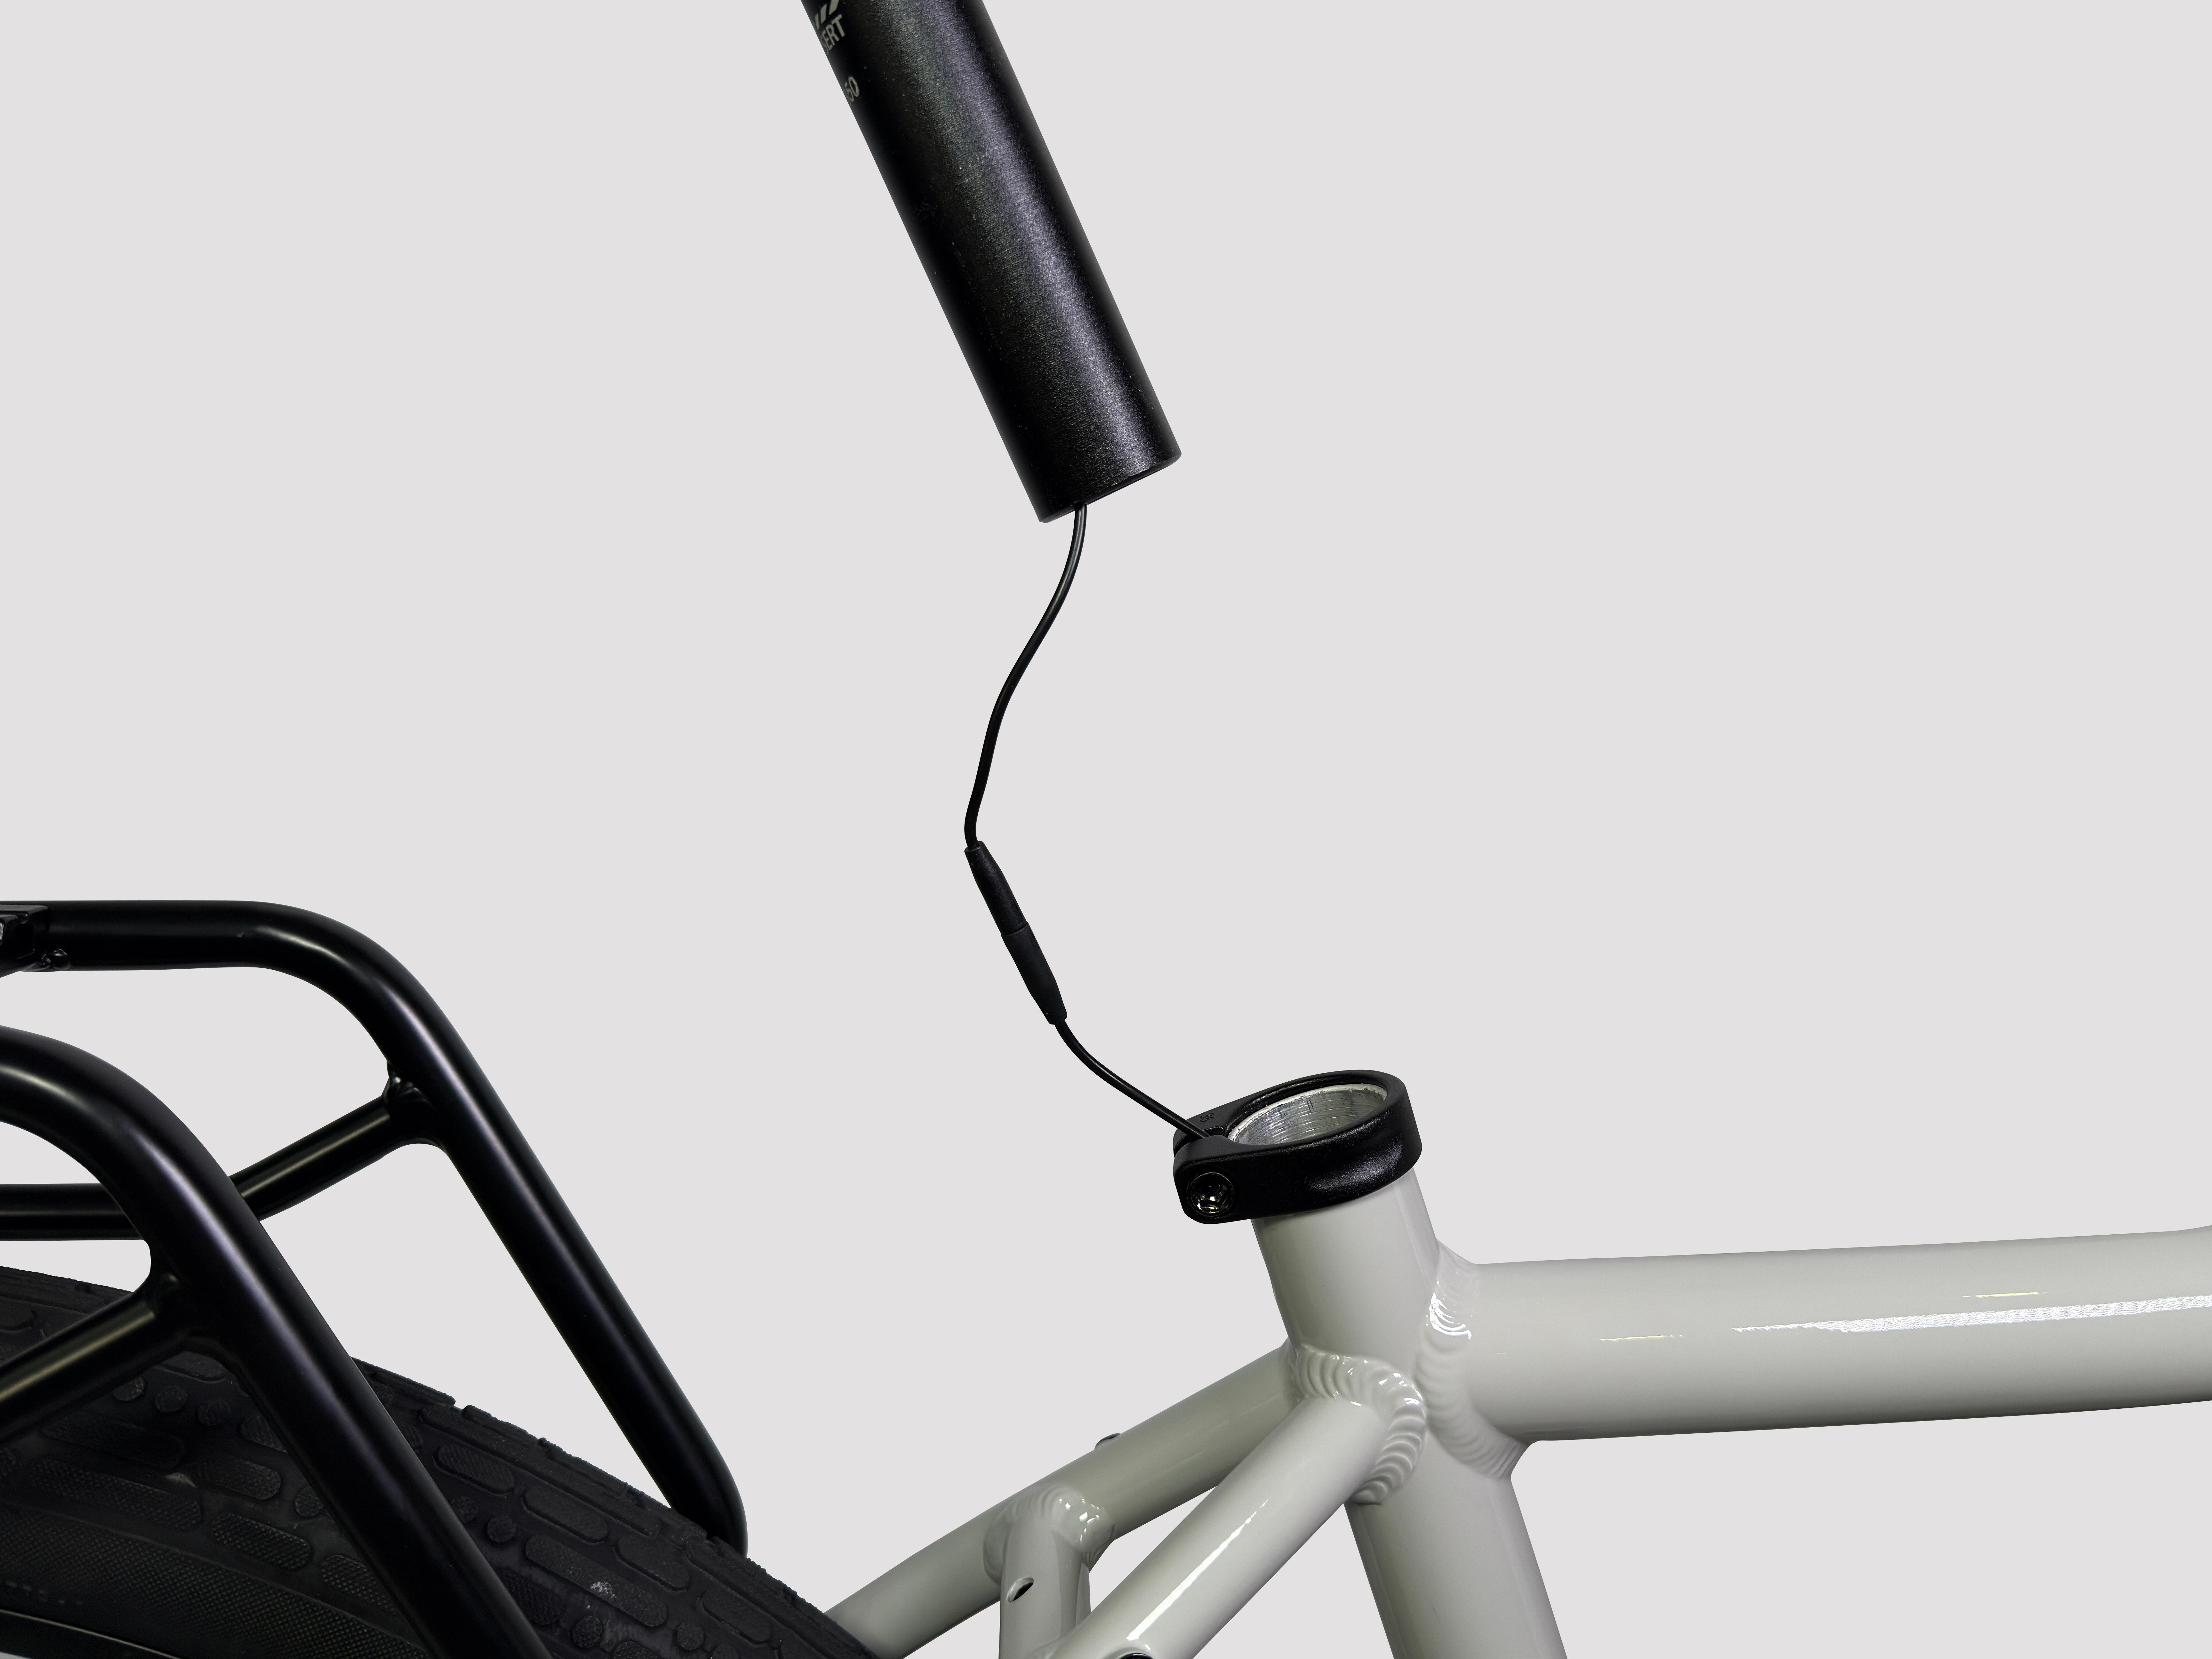
- Loosen the seat clamp with a 6mm hex wrench, remove the seat post from the frame, and then carefully disconnect the rear light cable.
- Gently pull the rear light cable from the integrated seat post clamp assembly. (Loosen the integrated clamp bolts with a 5mm hex wrench to allow enough clearance for the rear light plug.)
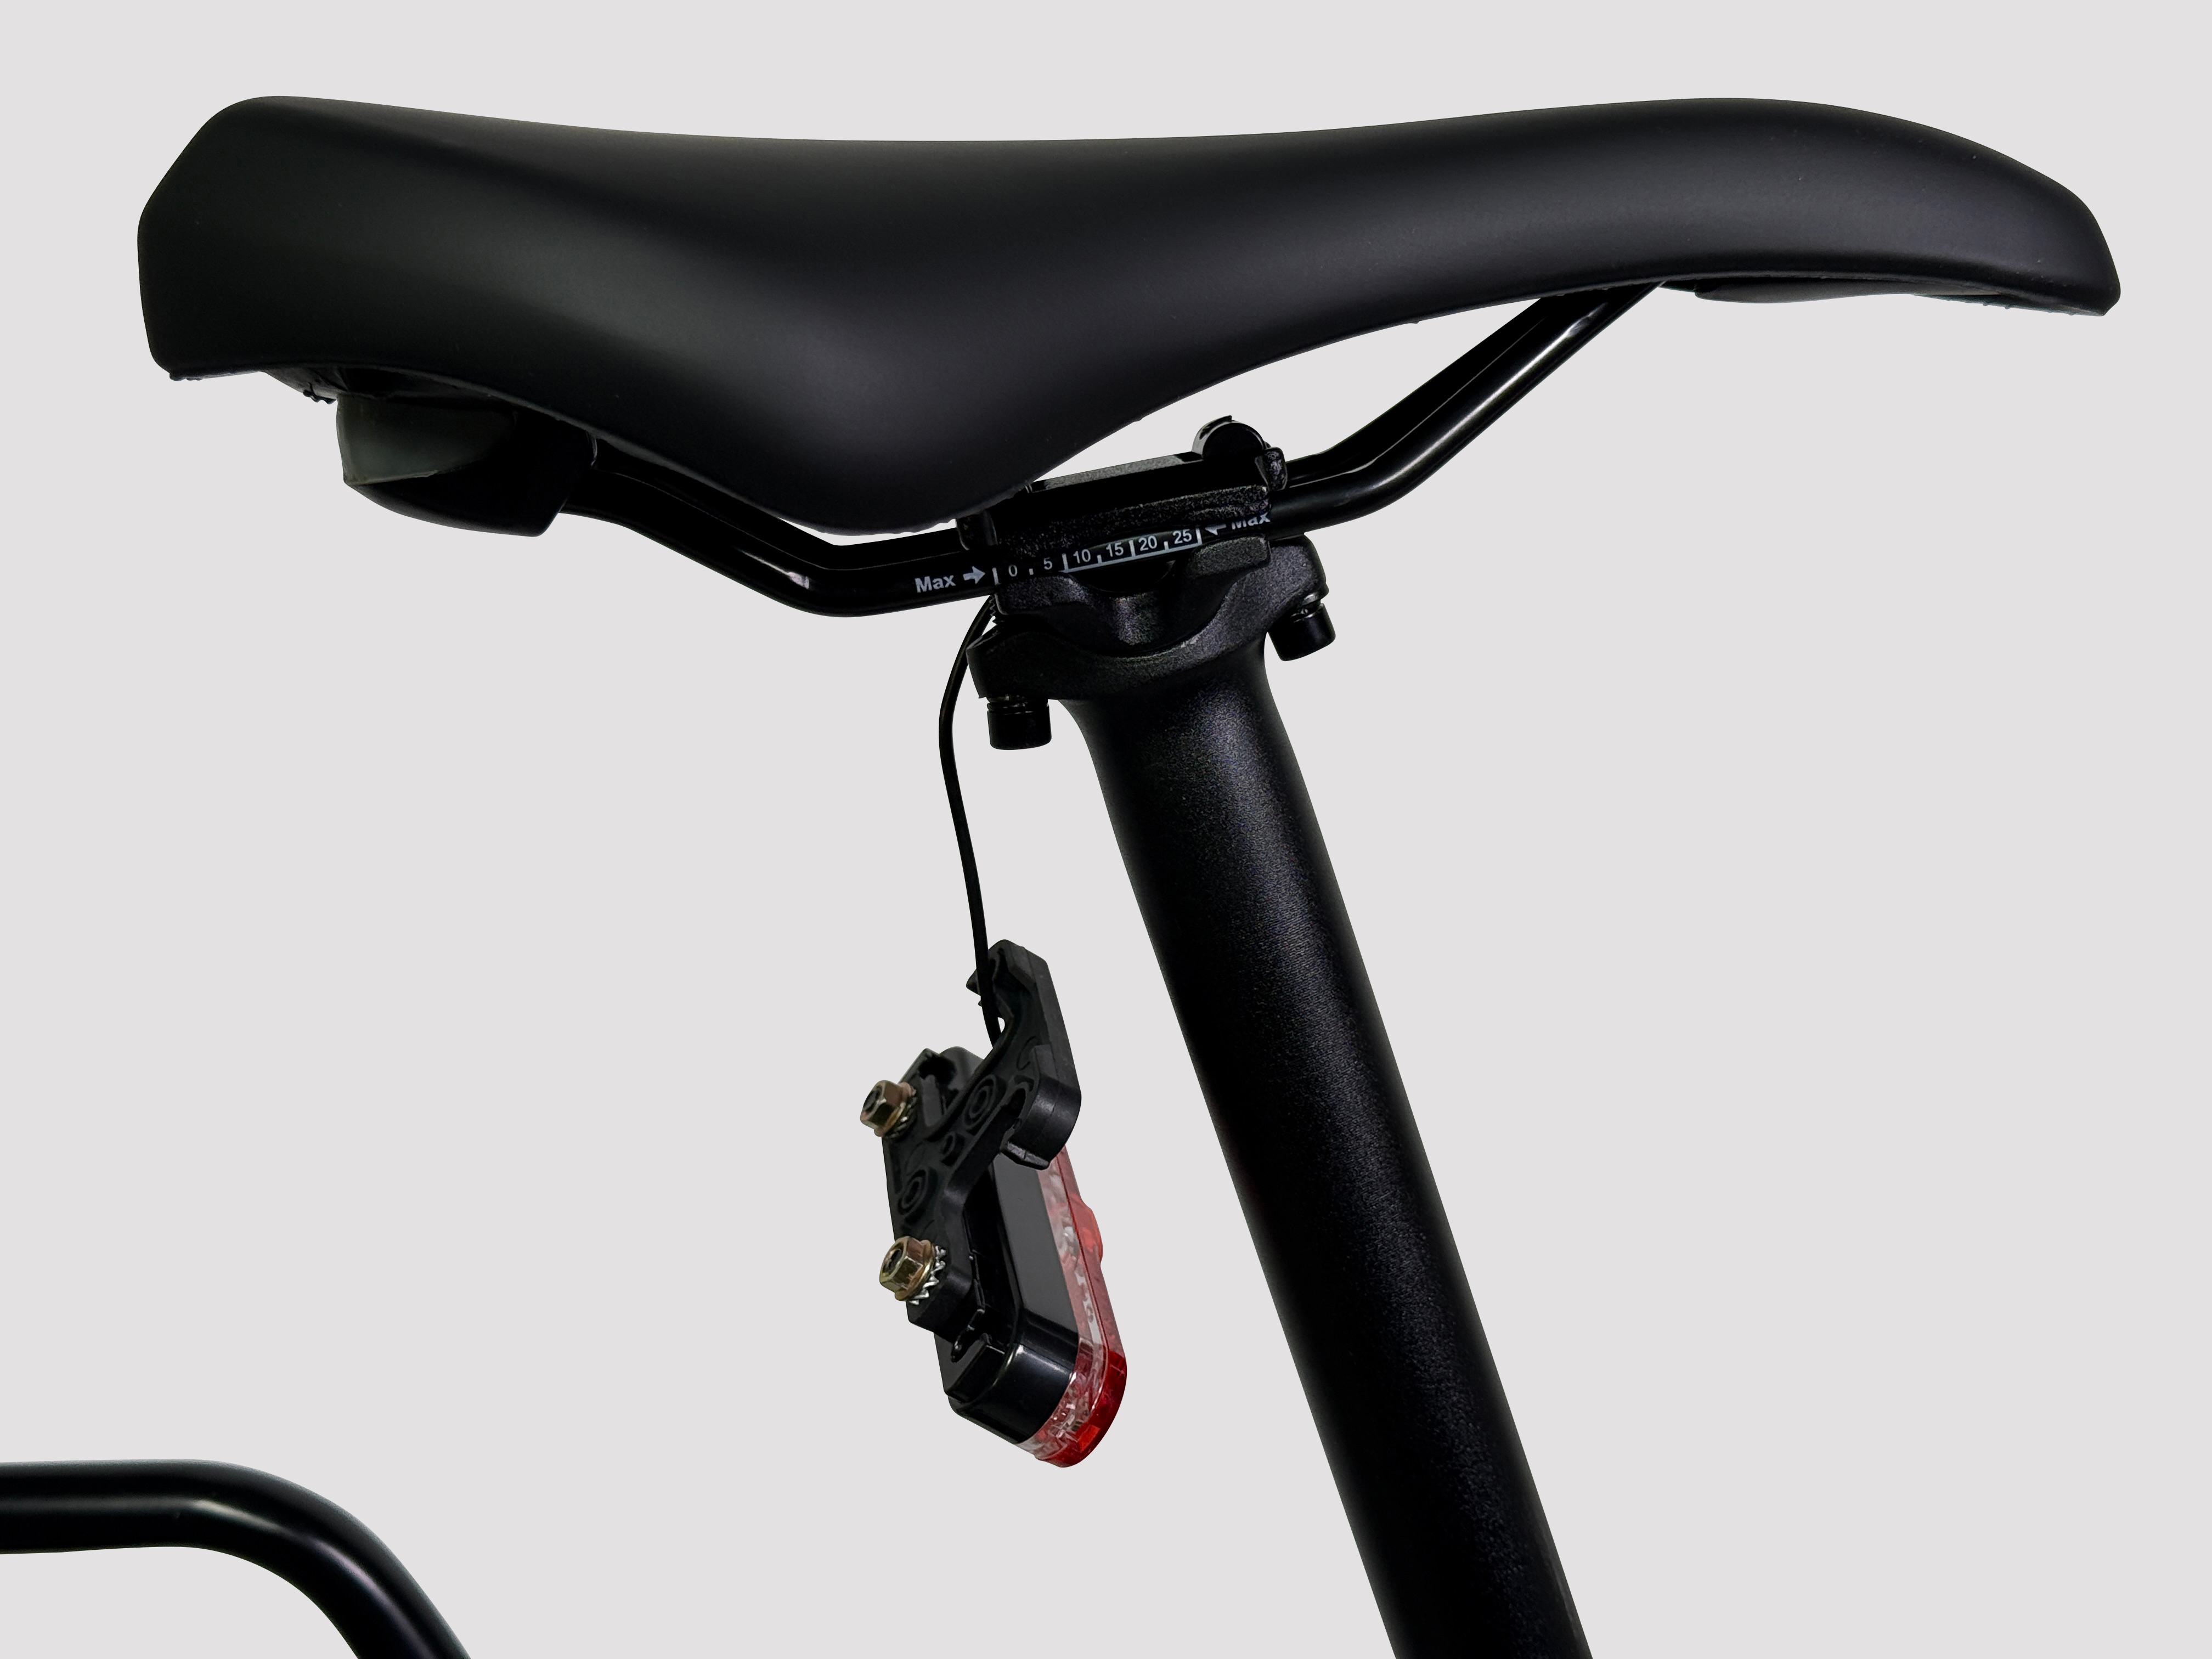
- Use an 8mm wrench to detach the light from the plastic seat rail clip. Note: the plastic clip is not required for rack installation.
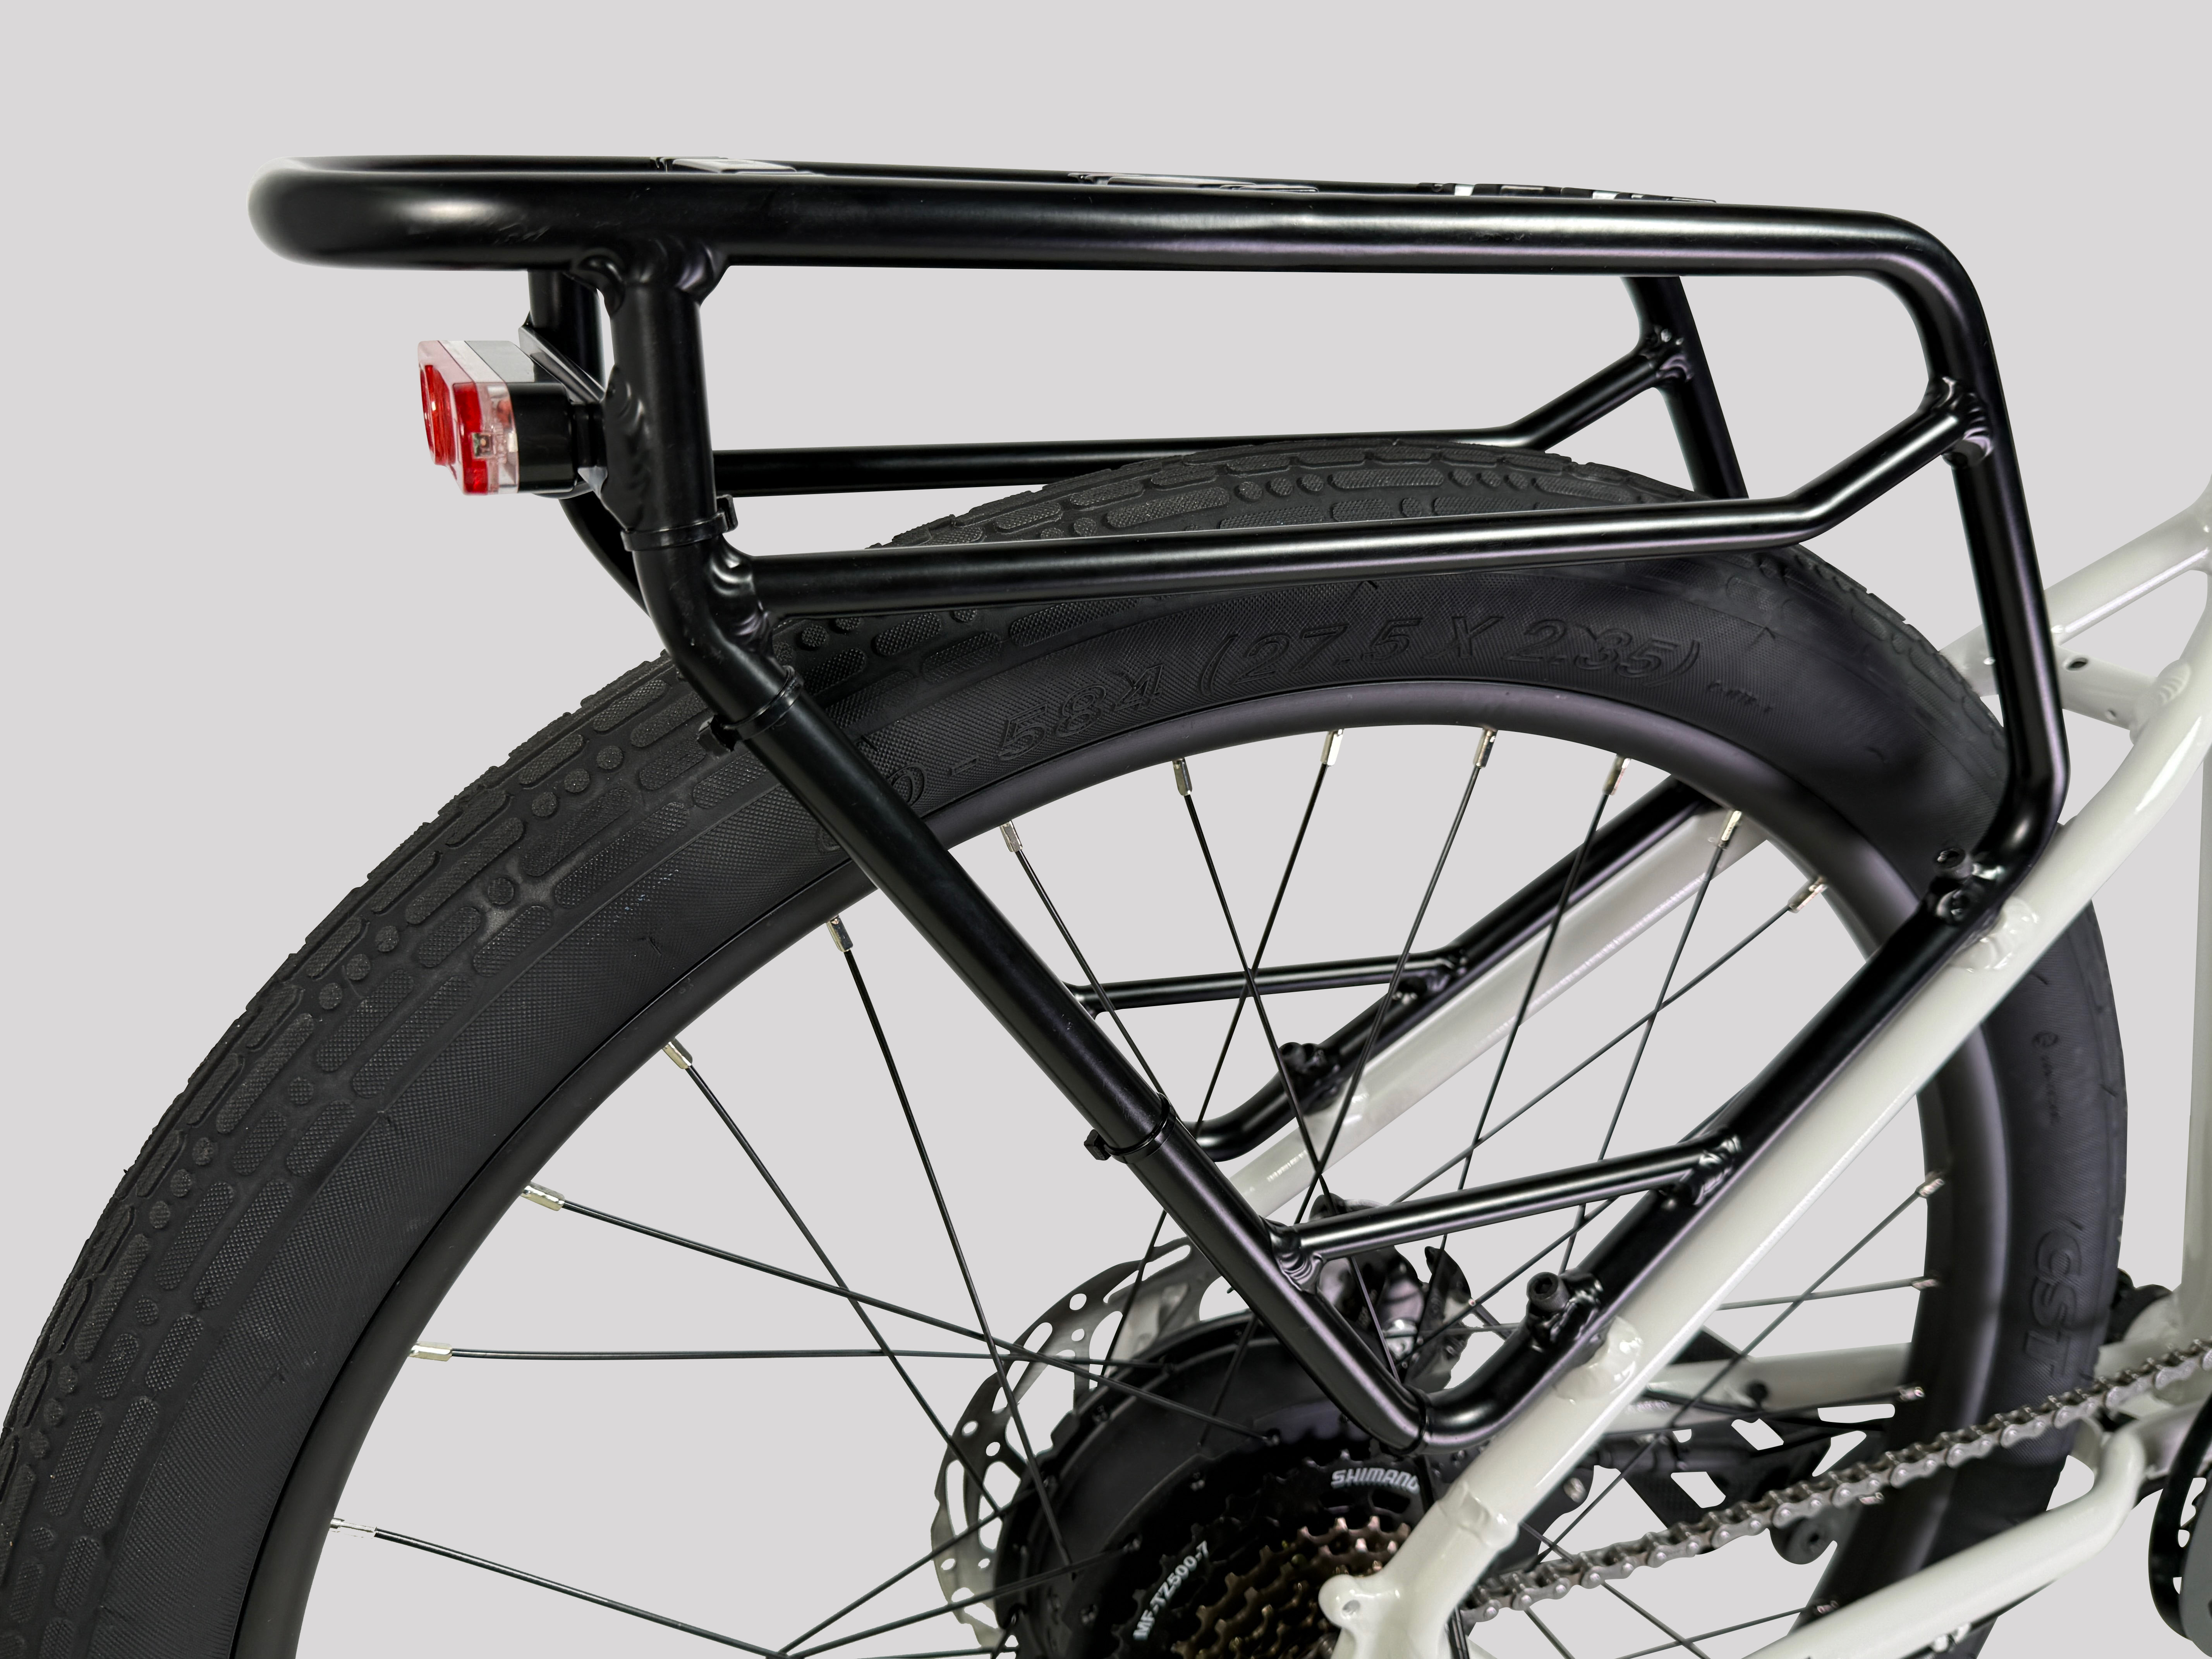
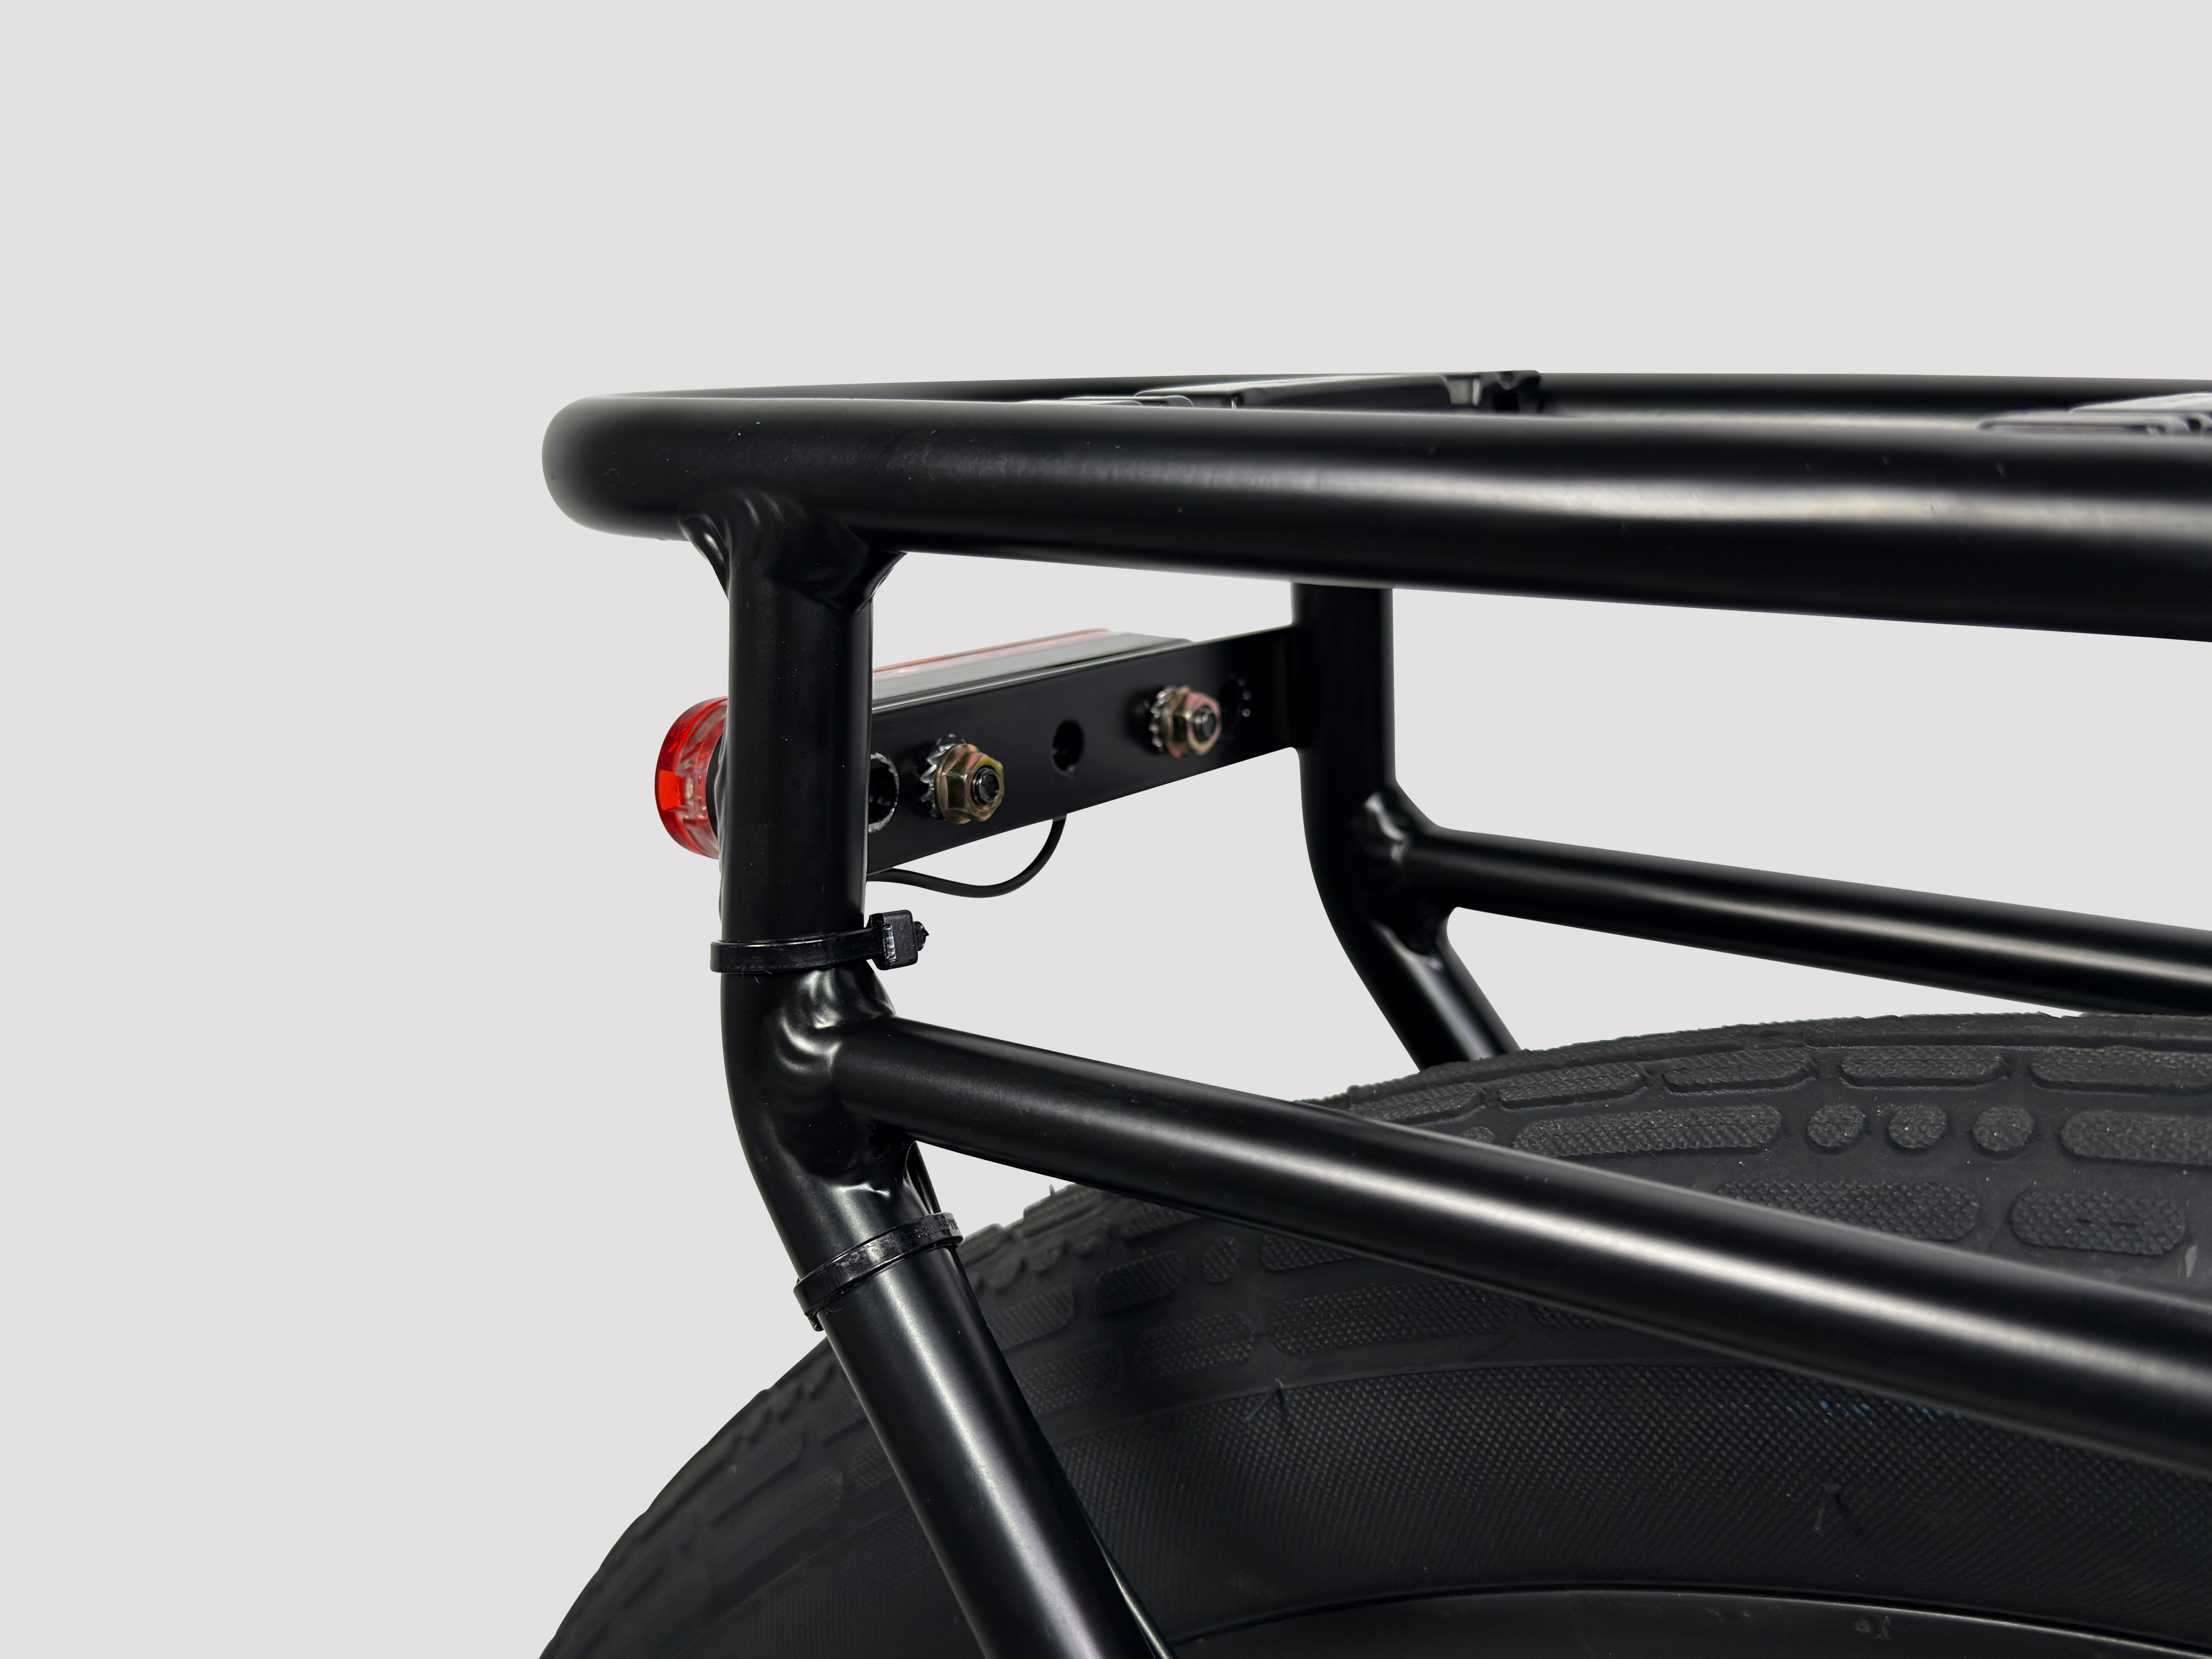
- Using the existing nuts and washers, secure the rear light to the rear rack with an 8mm wrench.
3. Access the rear light cable
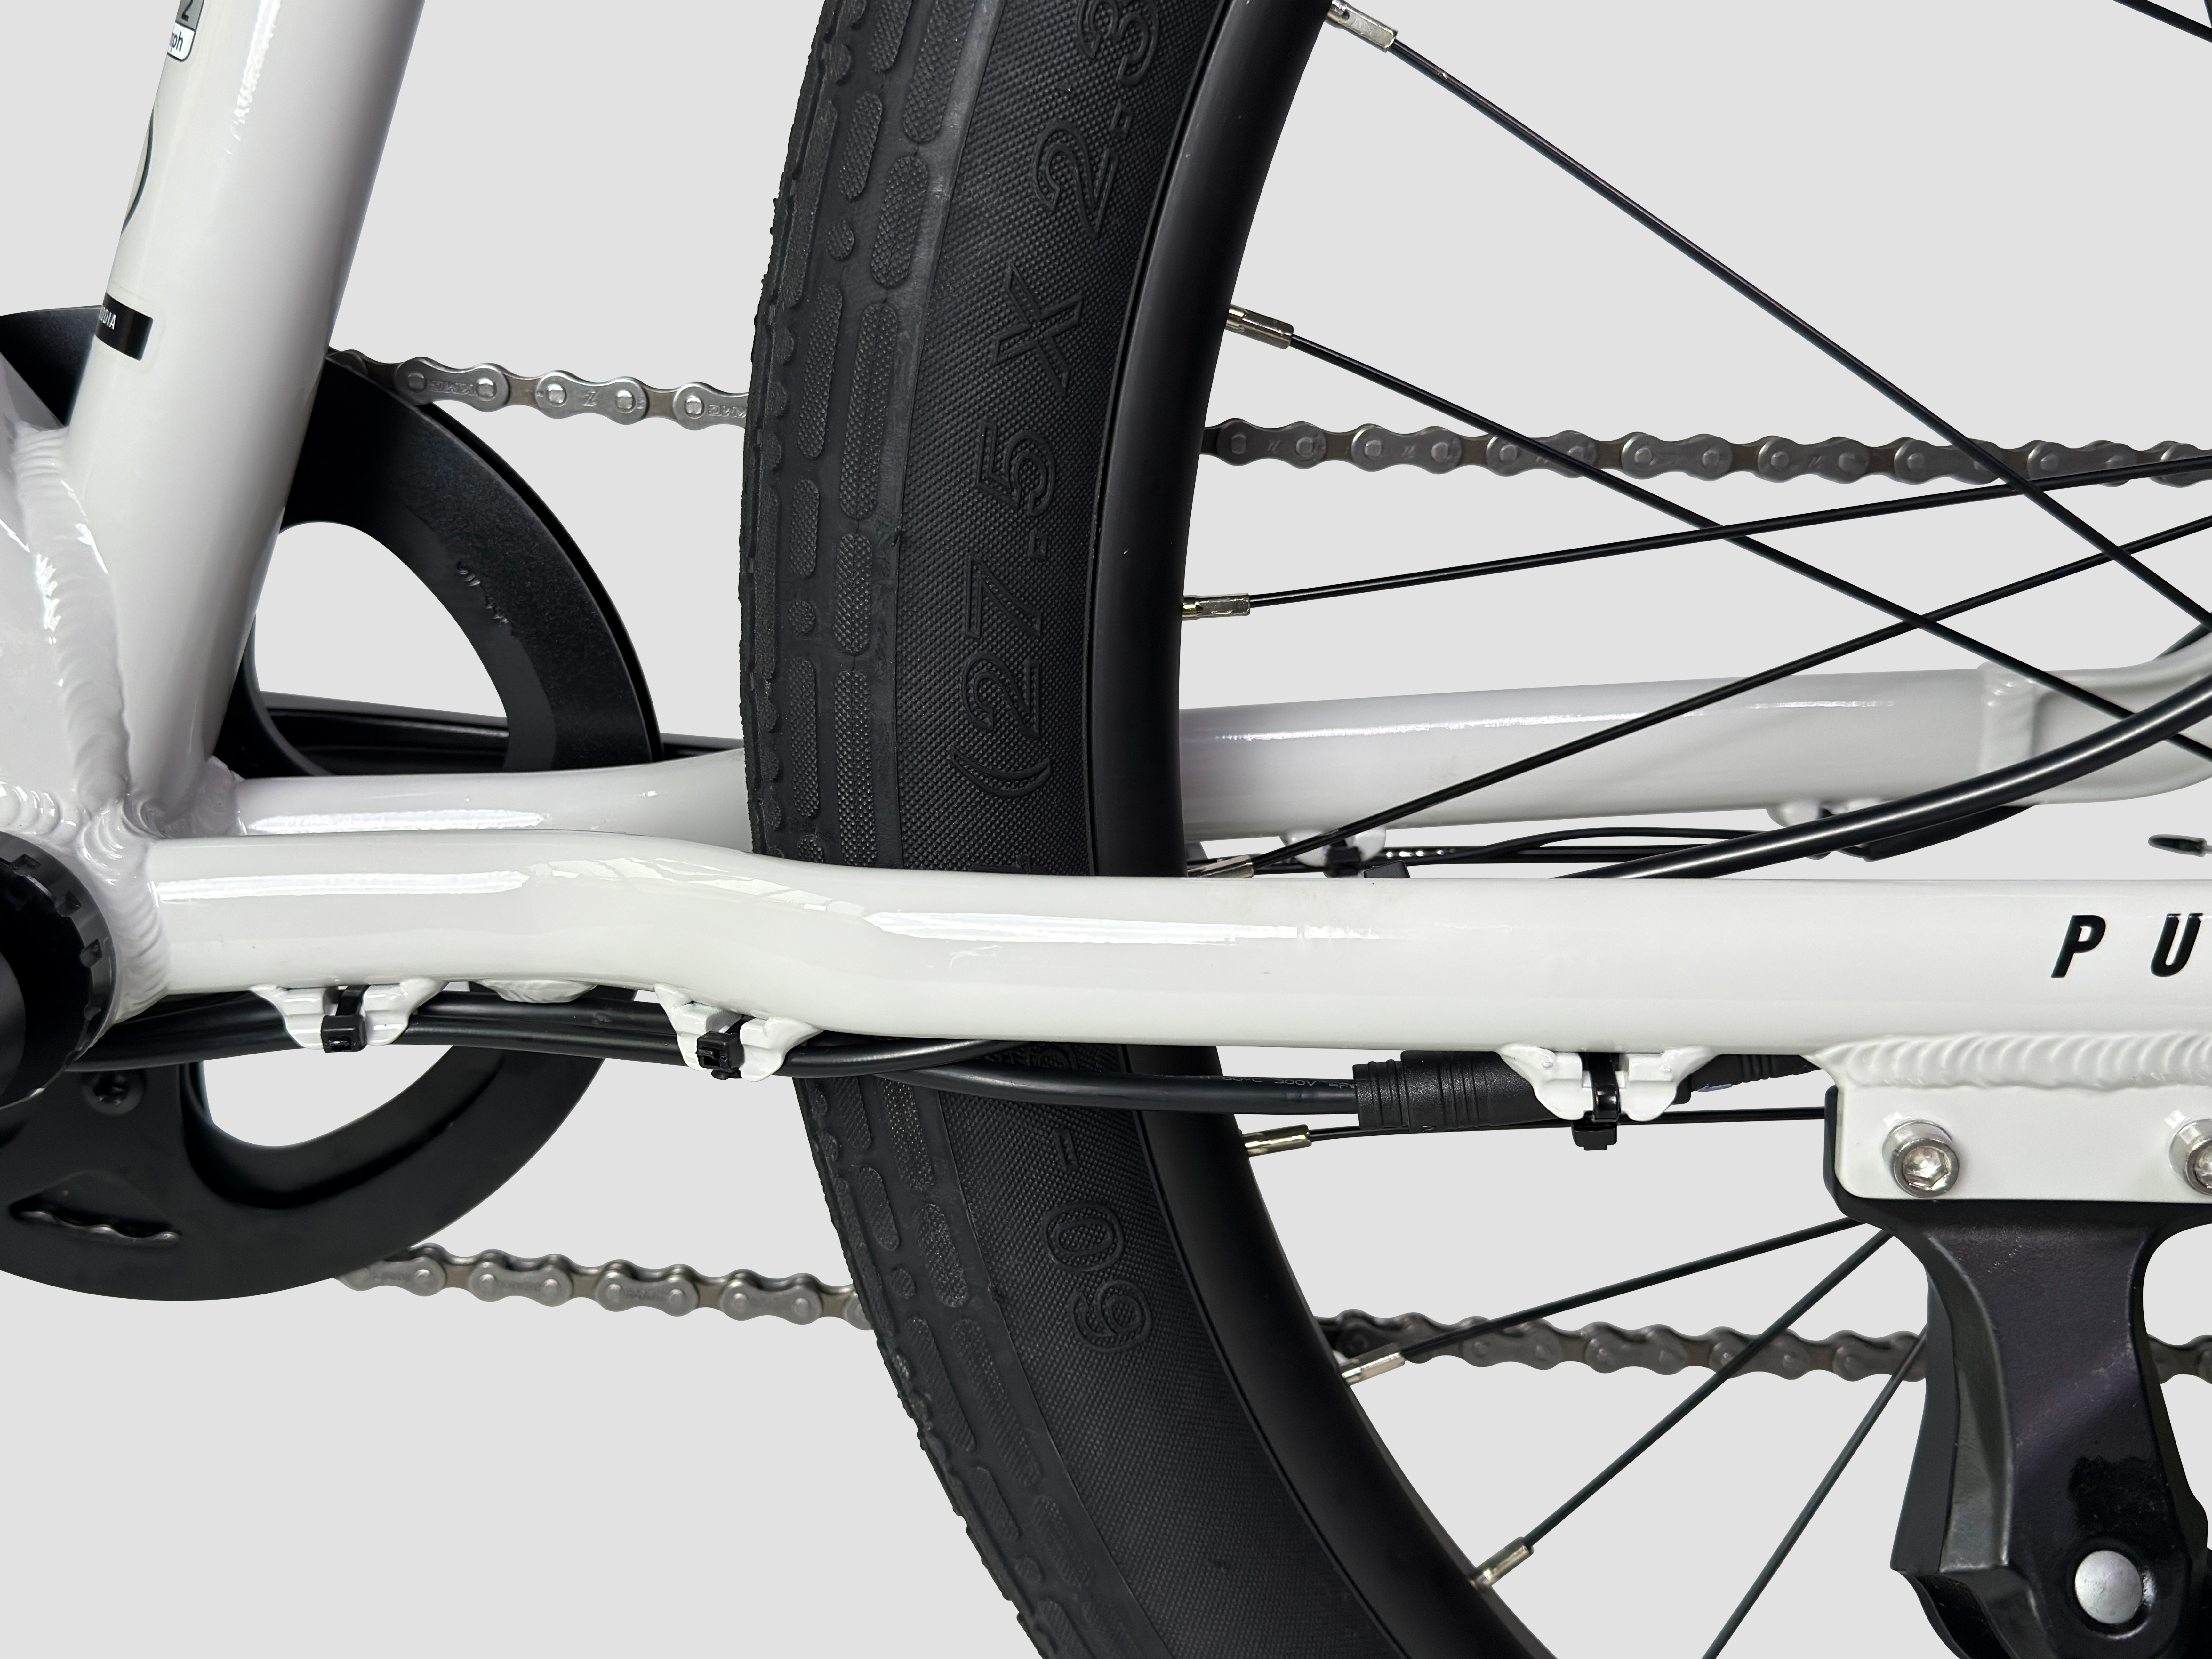
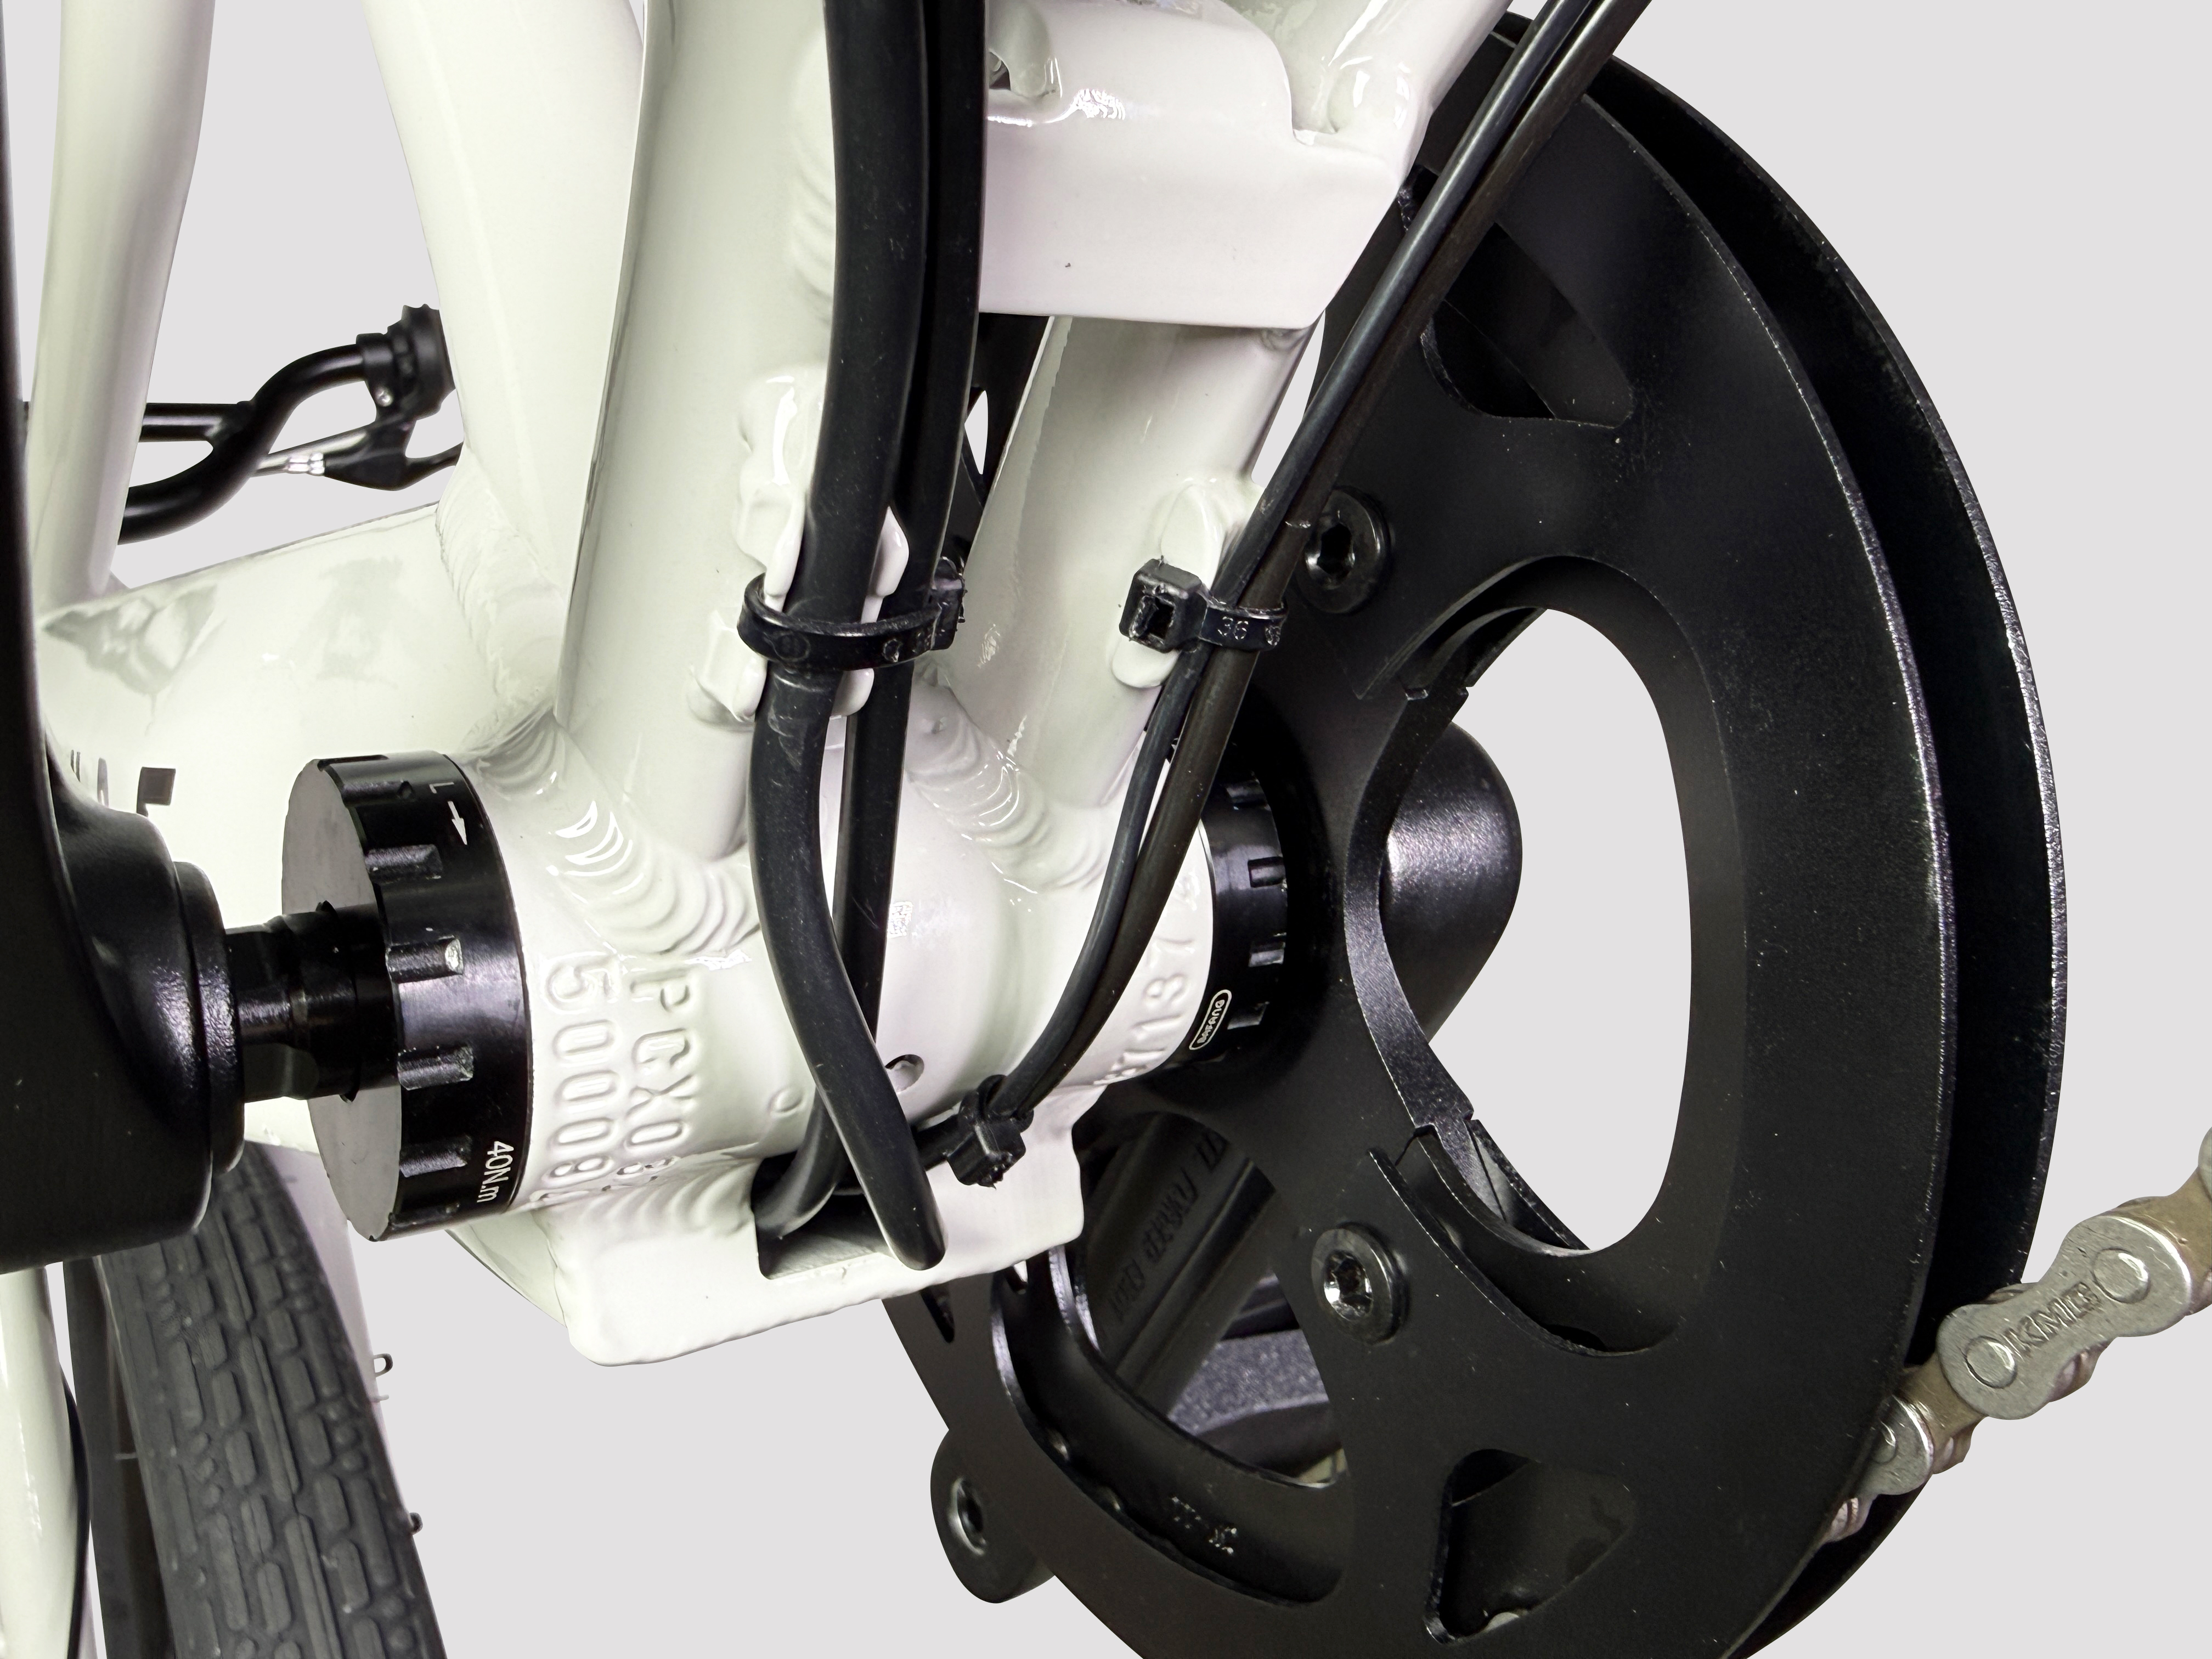
- Cut the 3 zip ties on the underside of the non-drive chain stay, and disconnect the main cable running to the motor.
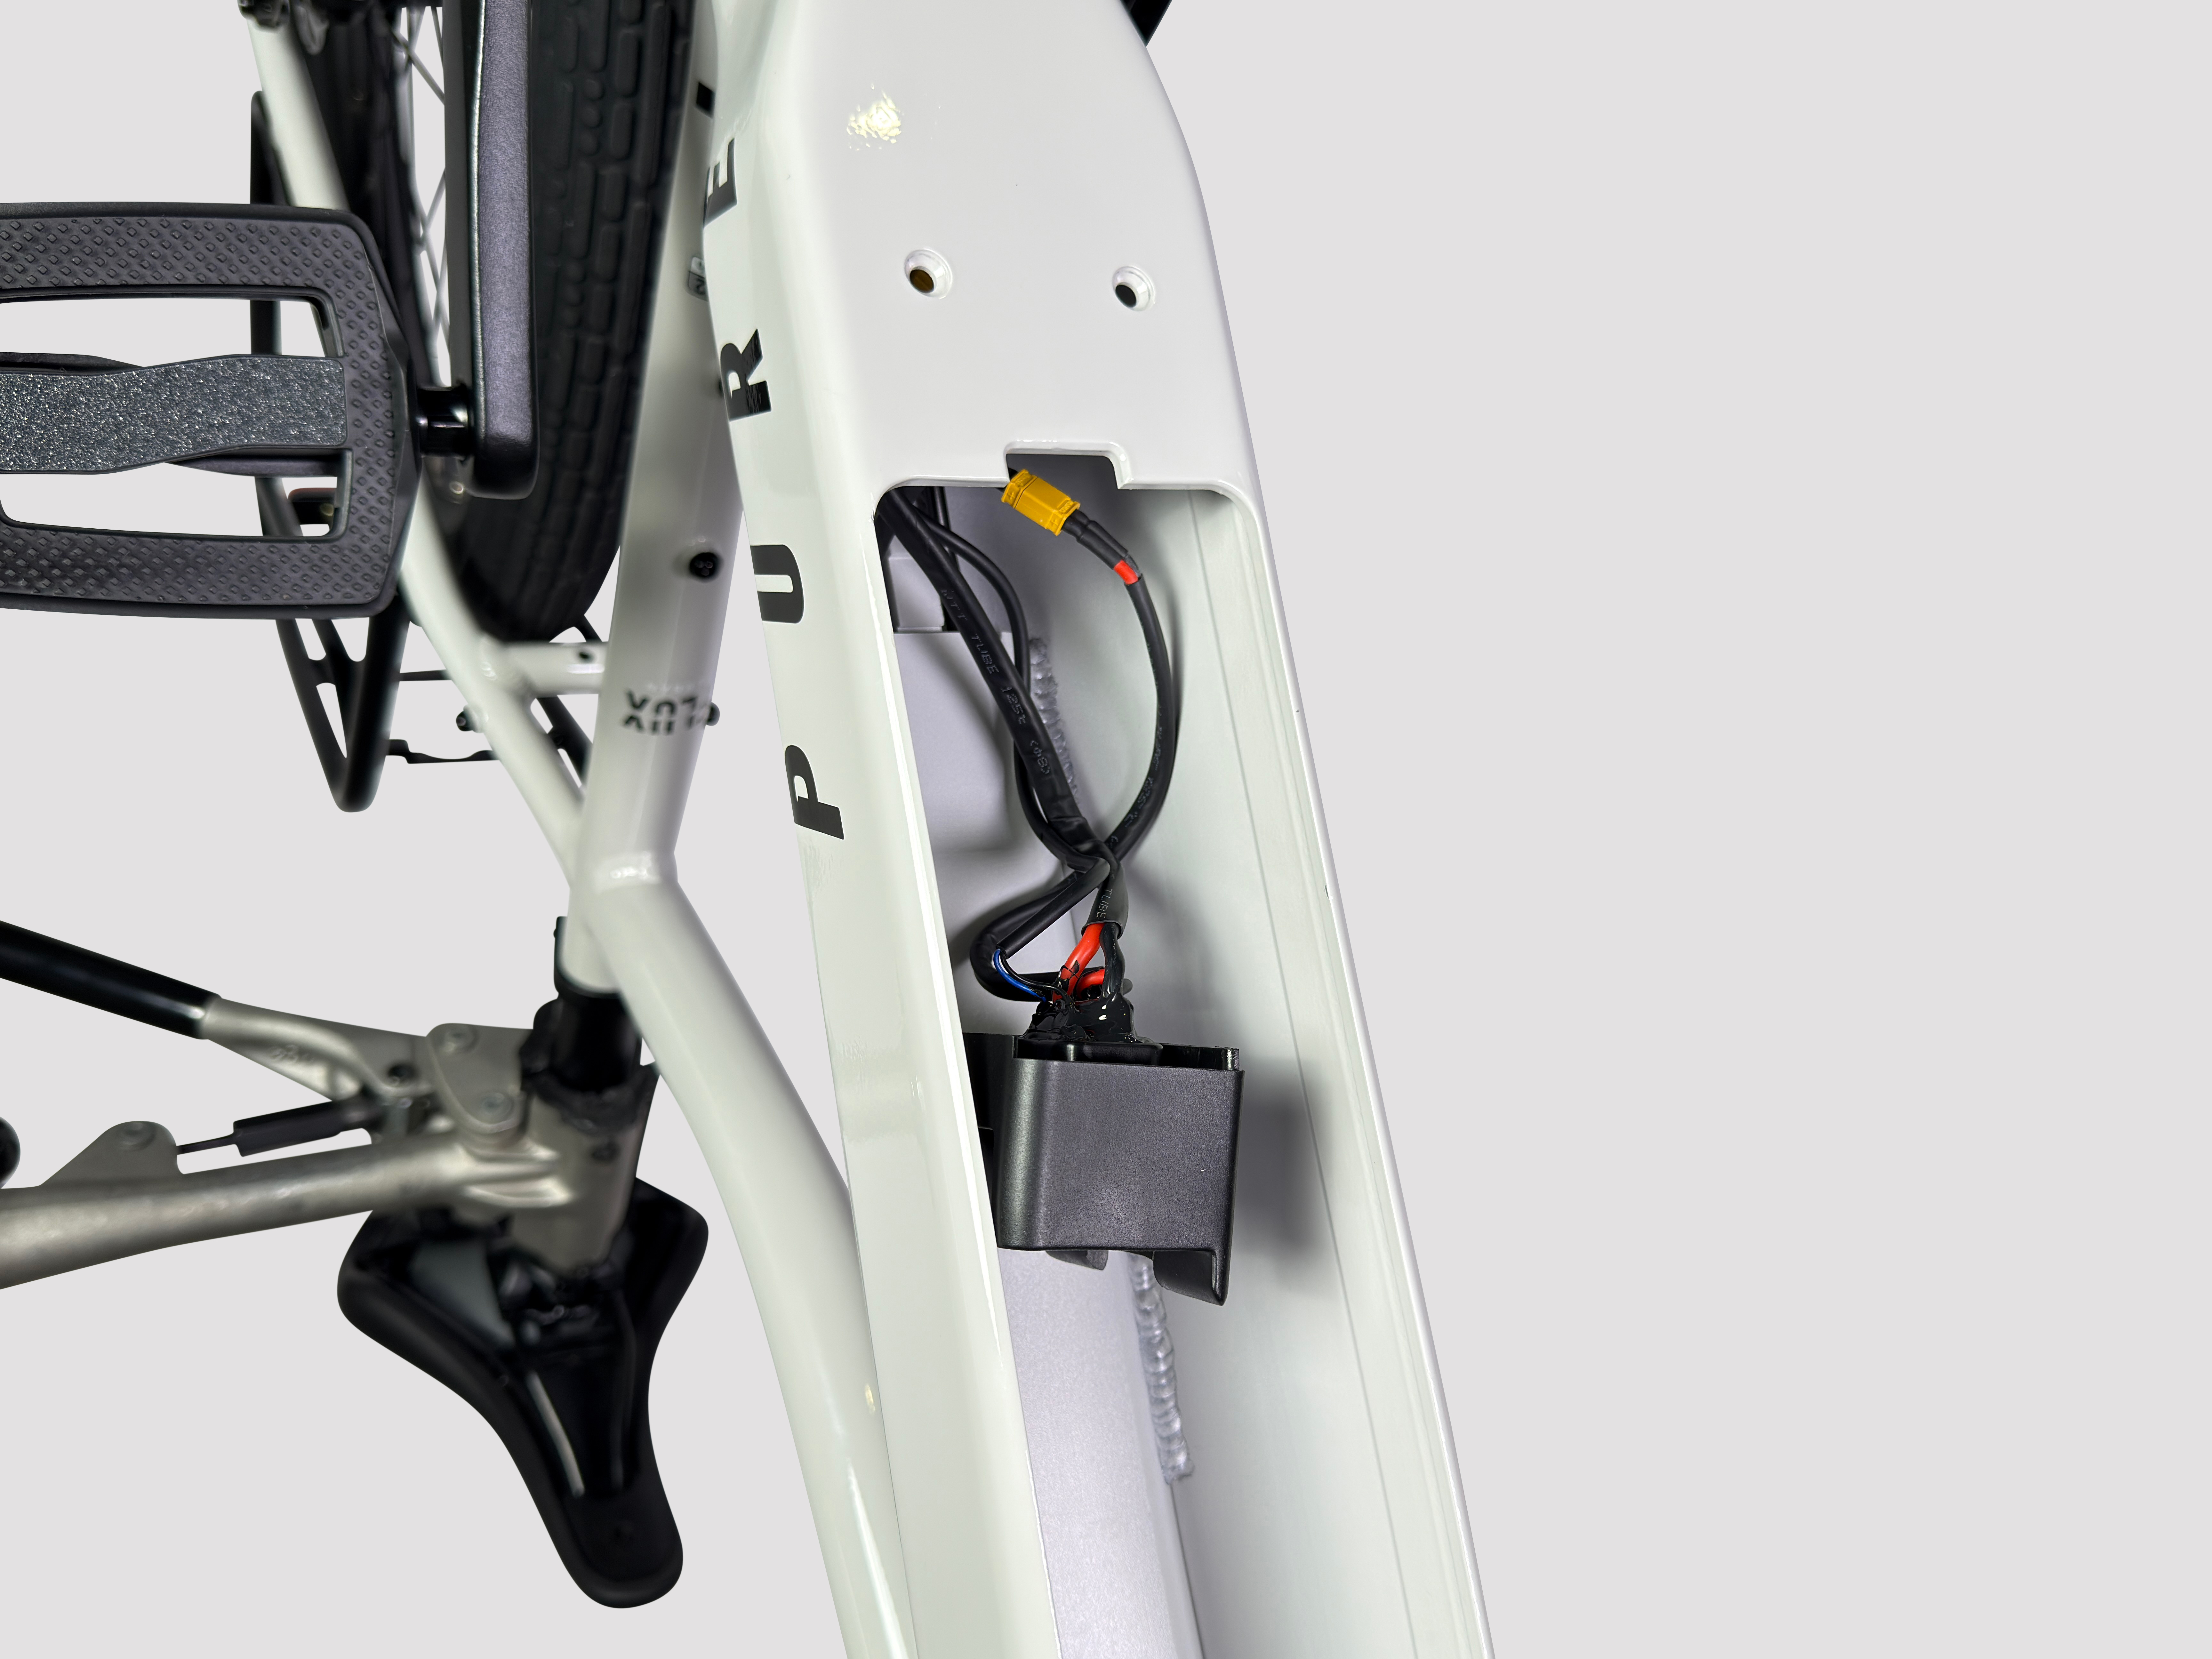
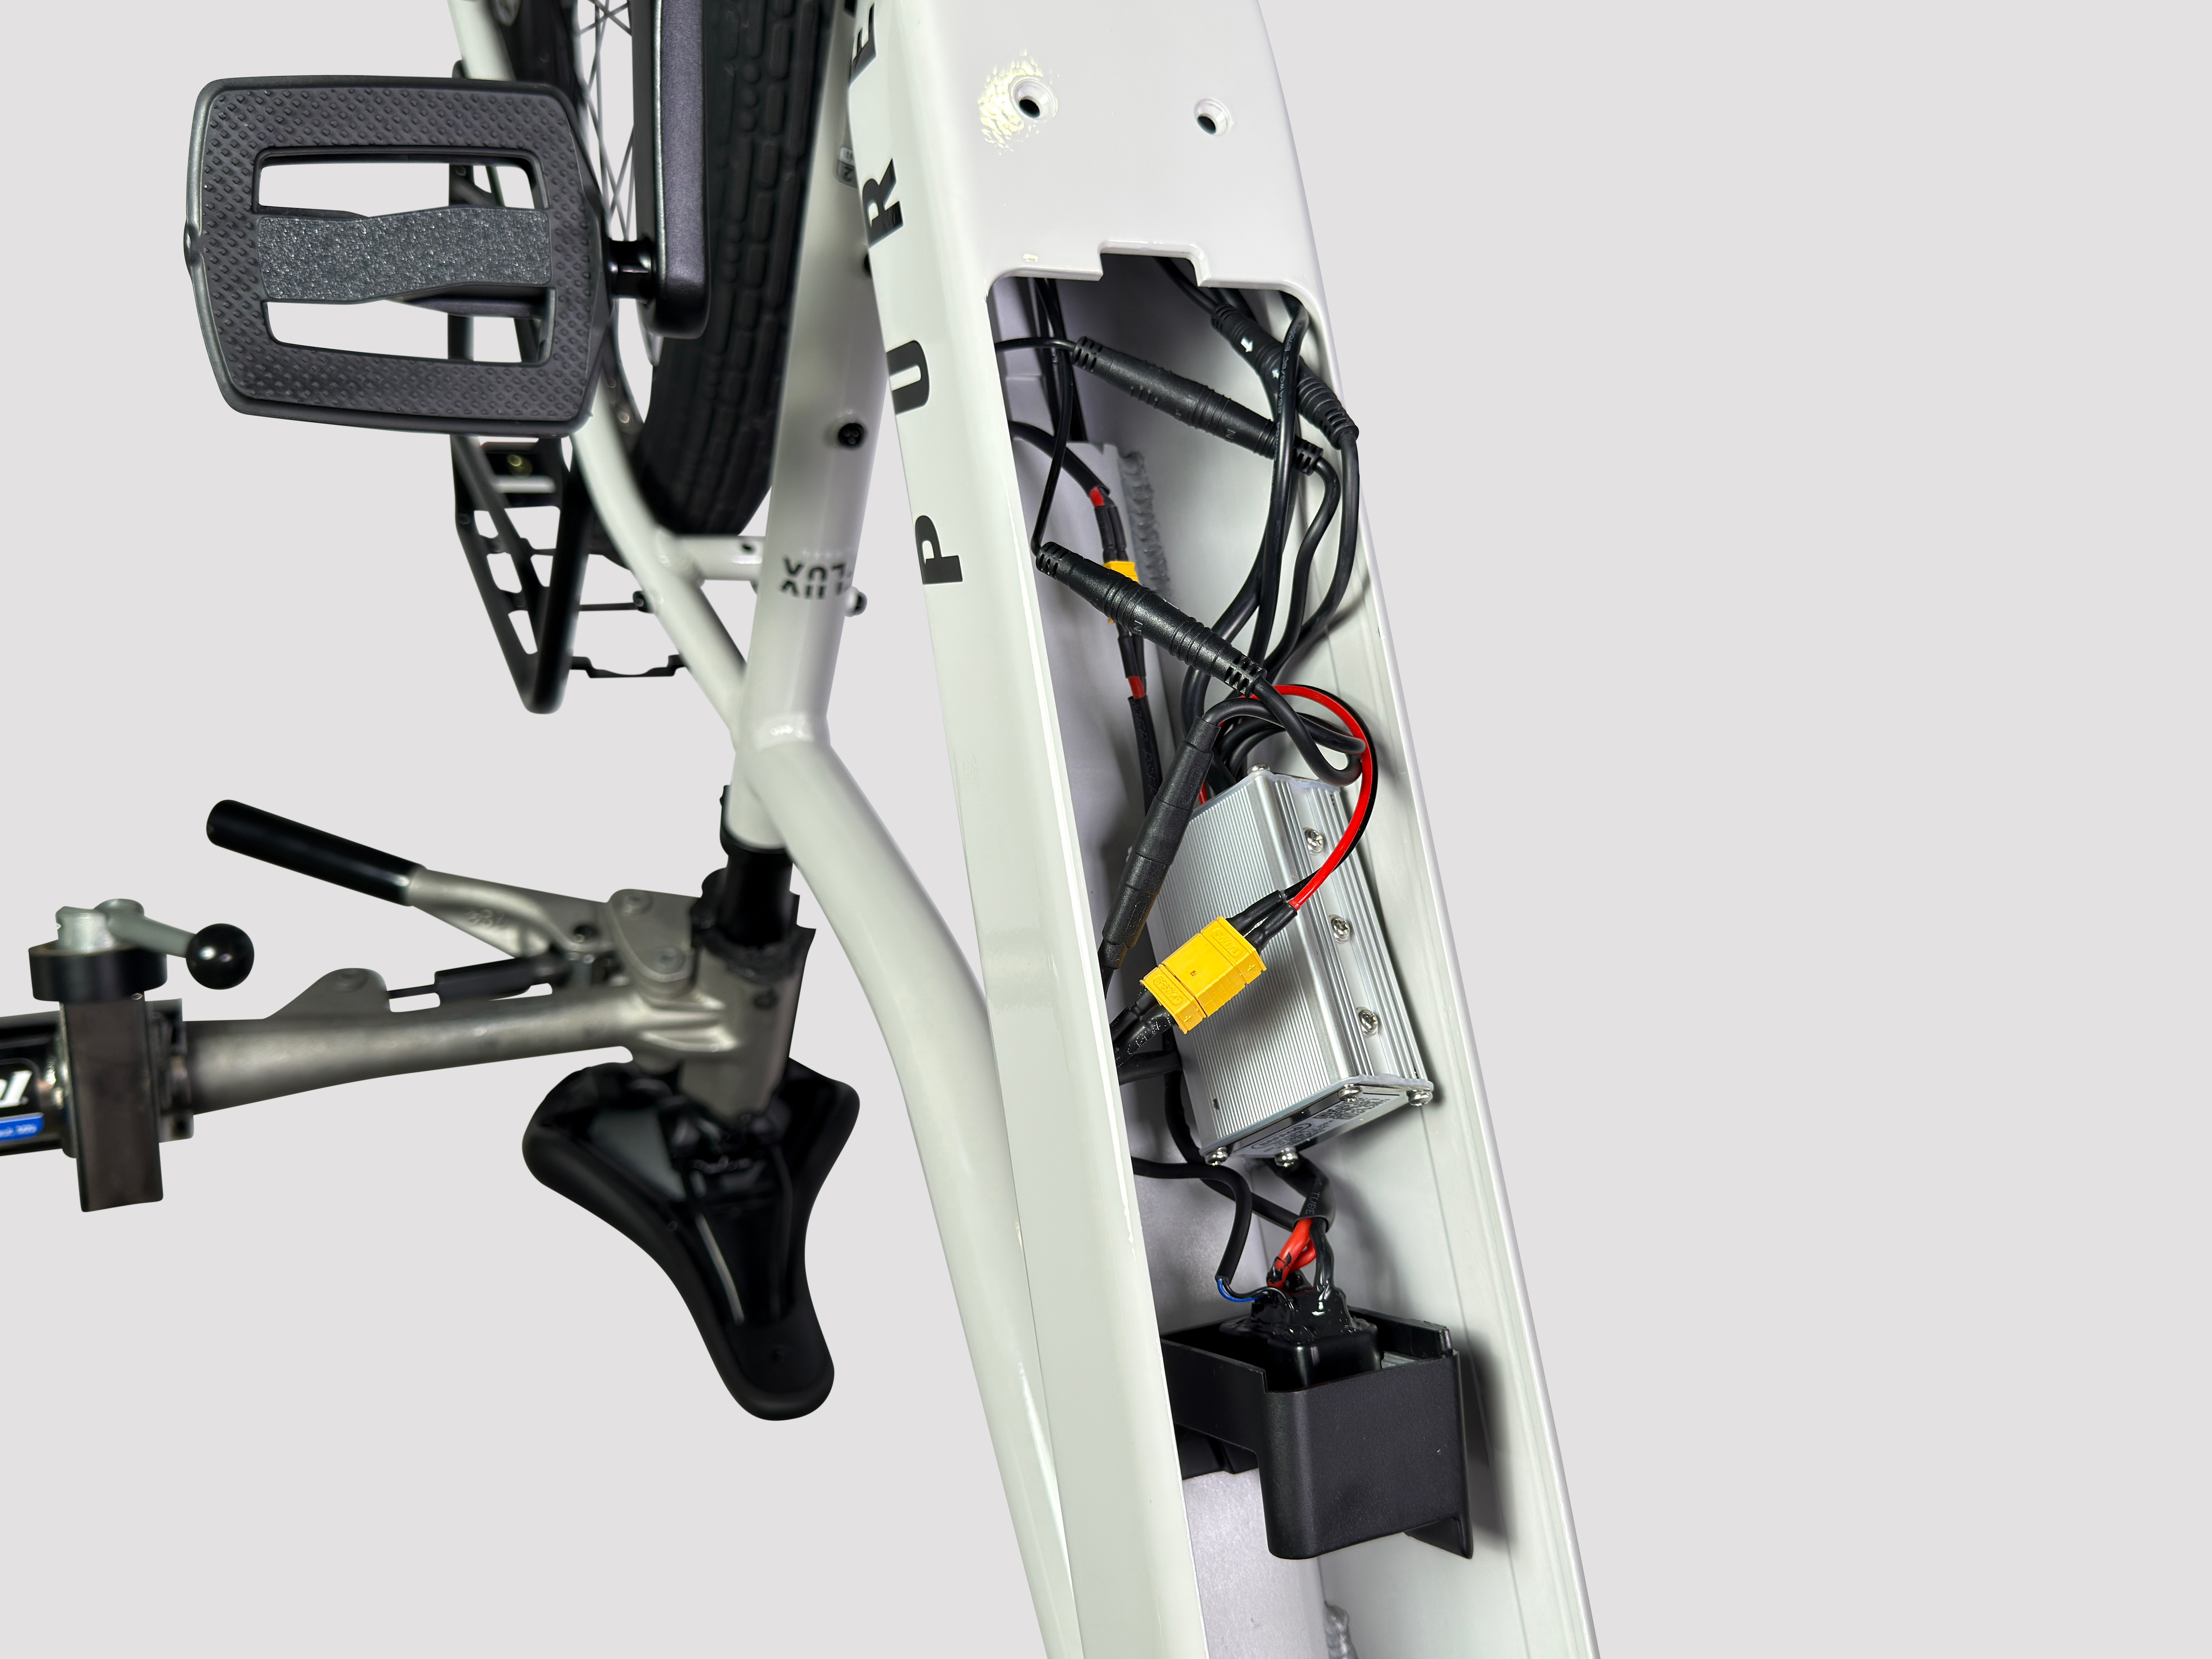
- Temporarily remove the battery cover and battery
- Using a T25 Torx wrench, remove both bolts securing the lower battery mount. Carefully slide the mount partially out of the frame, being mindful not to damage or disconnect any cables.
- Partially remove the controller to access the rear light cable. To create enough slack for this step, cut the 3 zip ties securing the motor cable and then unplug the rear motor cable near the rear wheel before continuing.
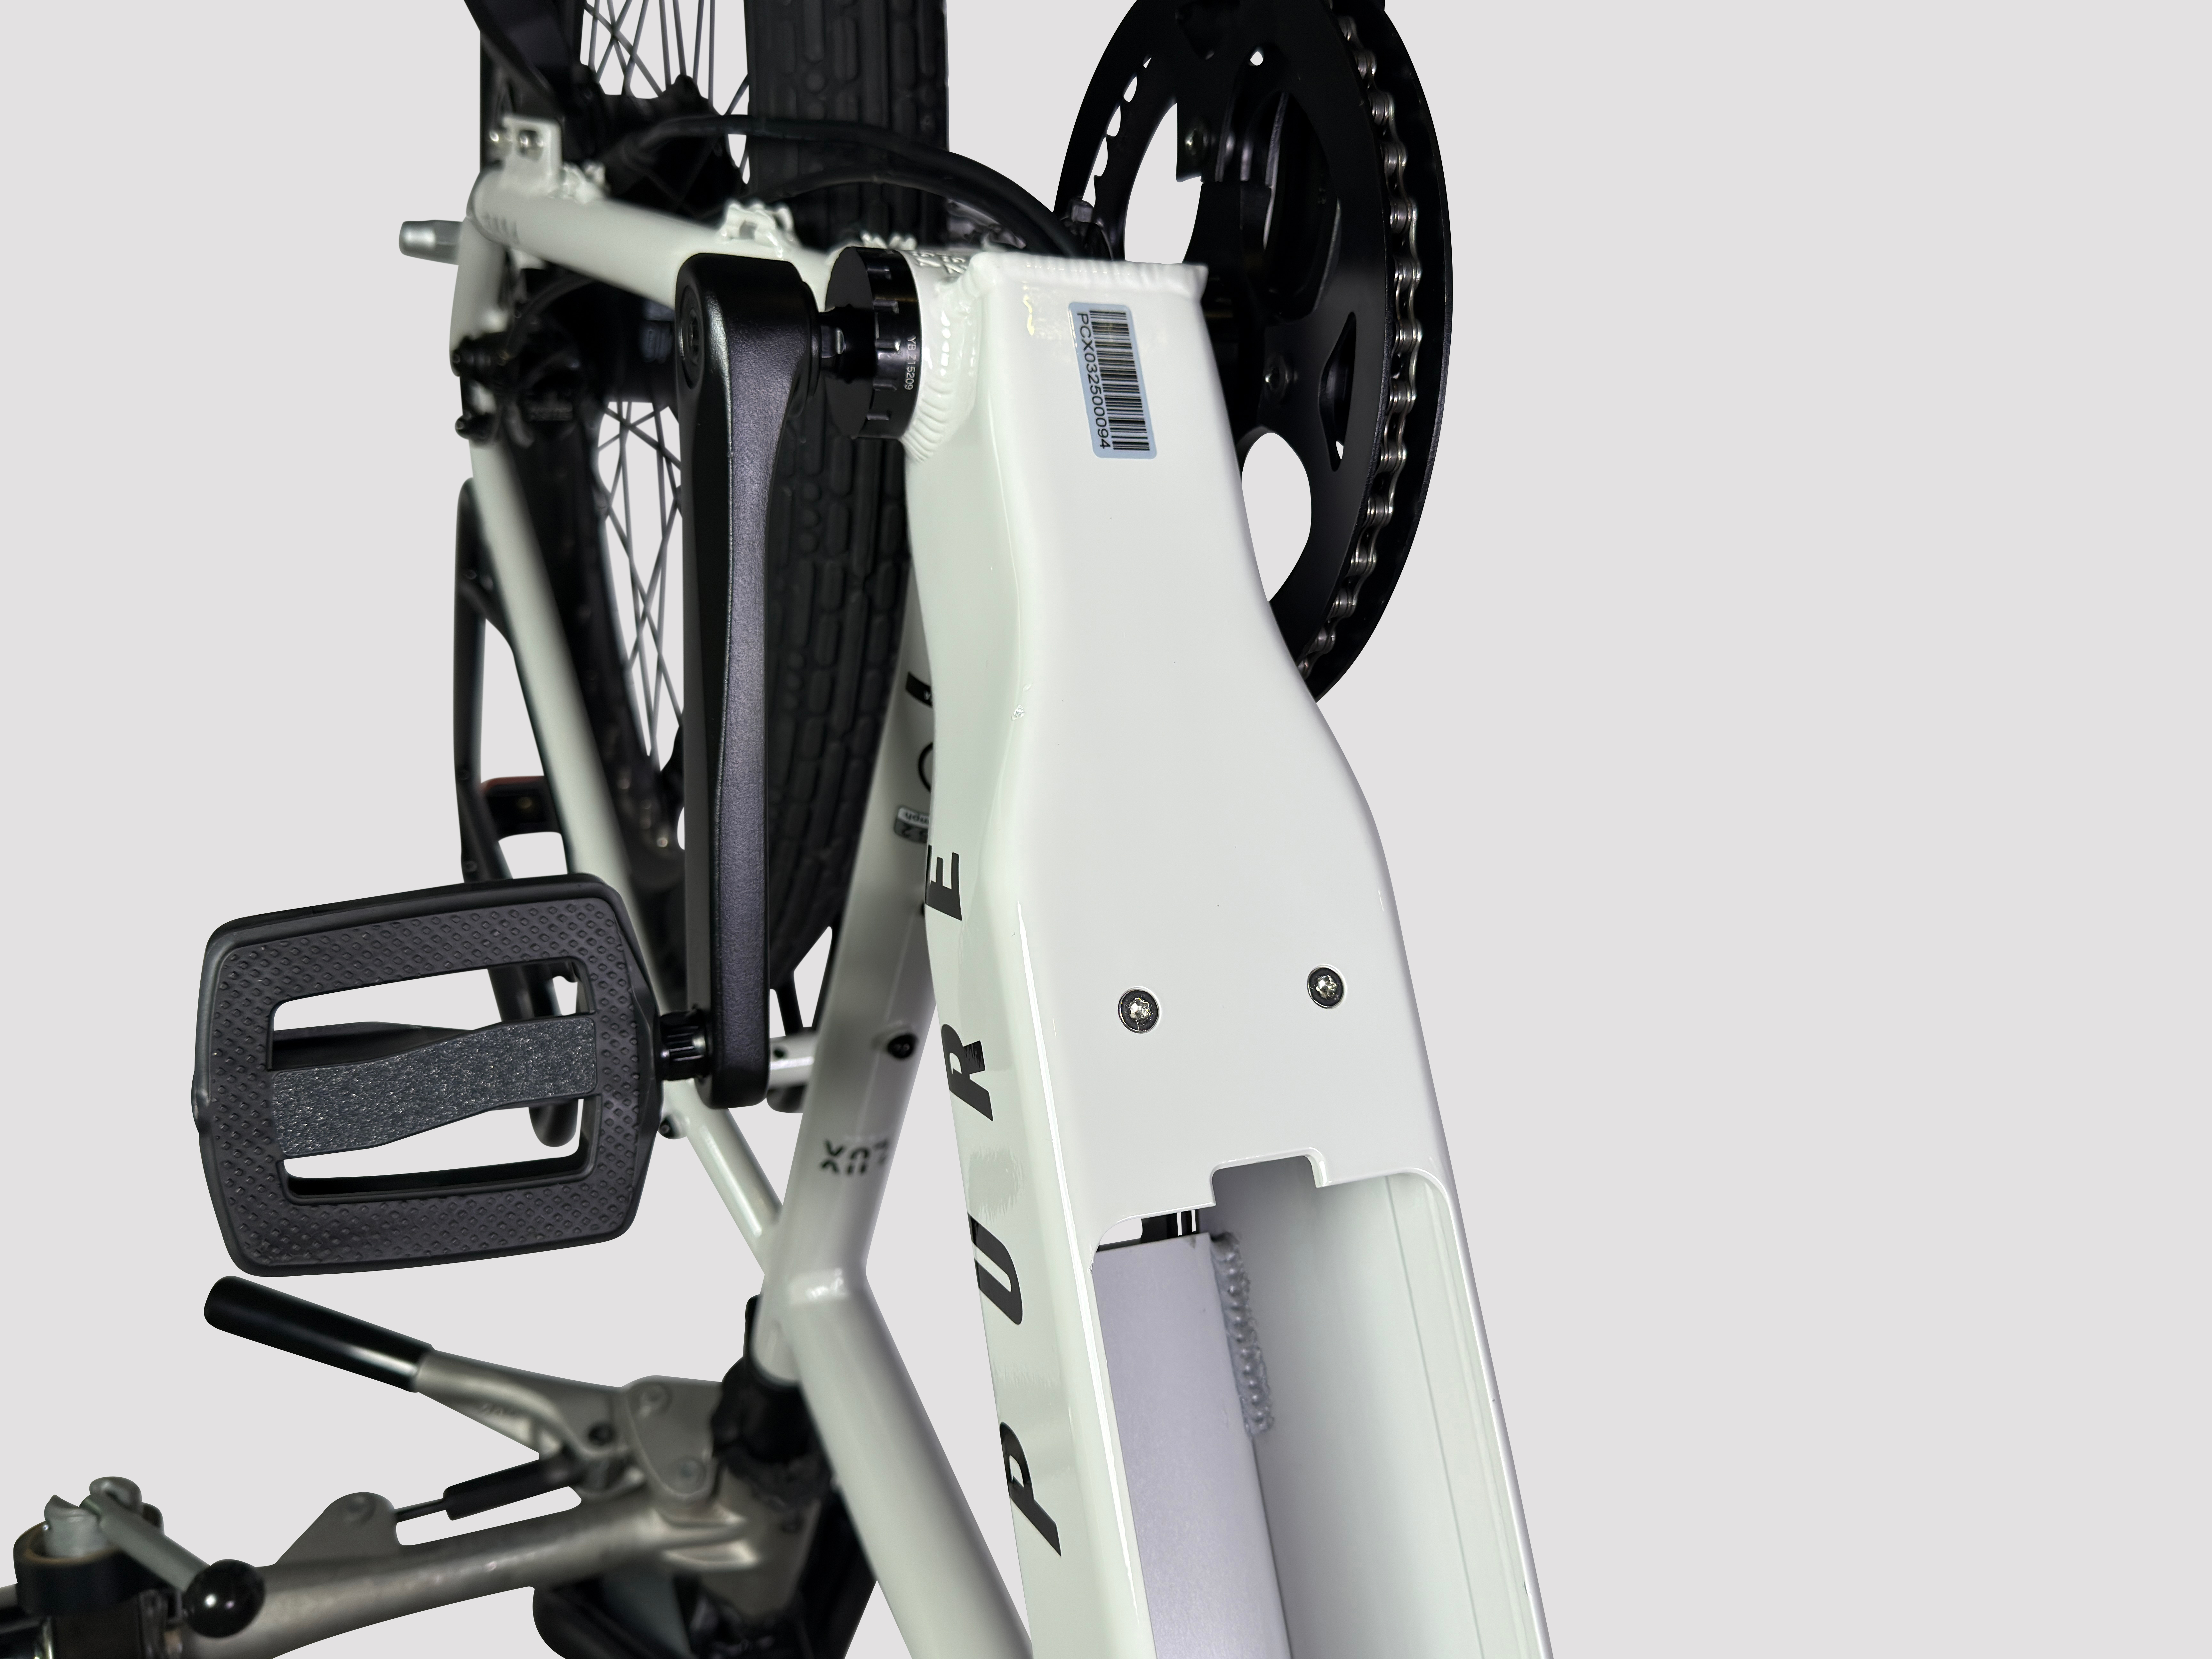
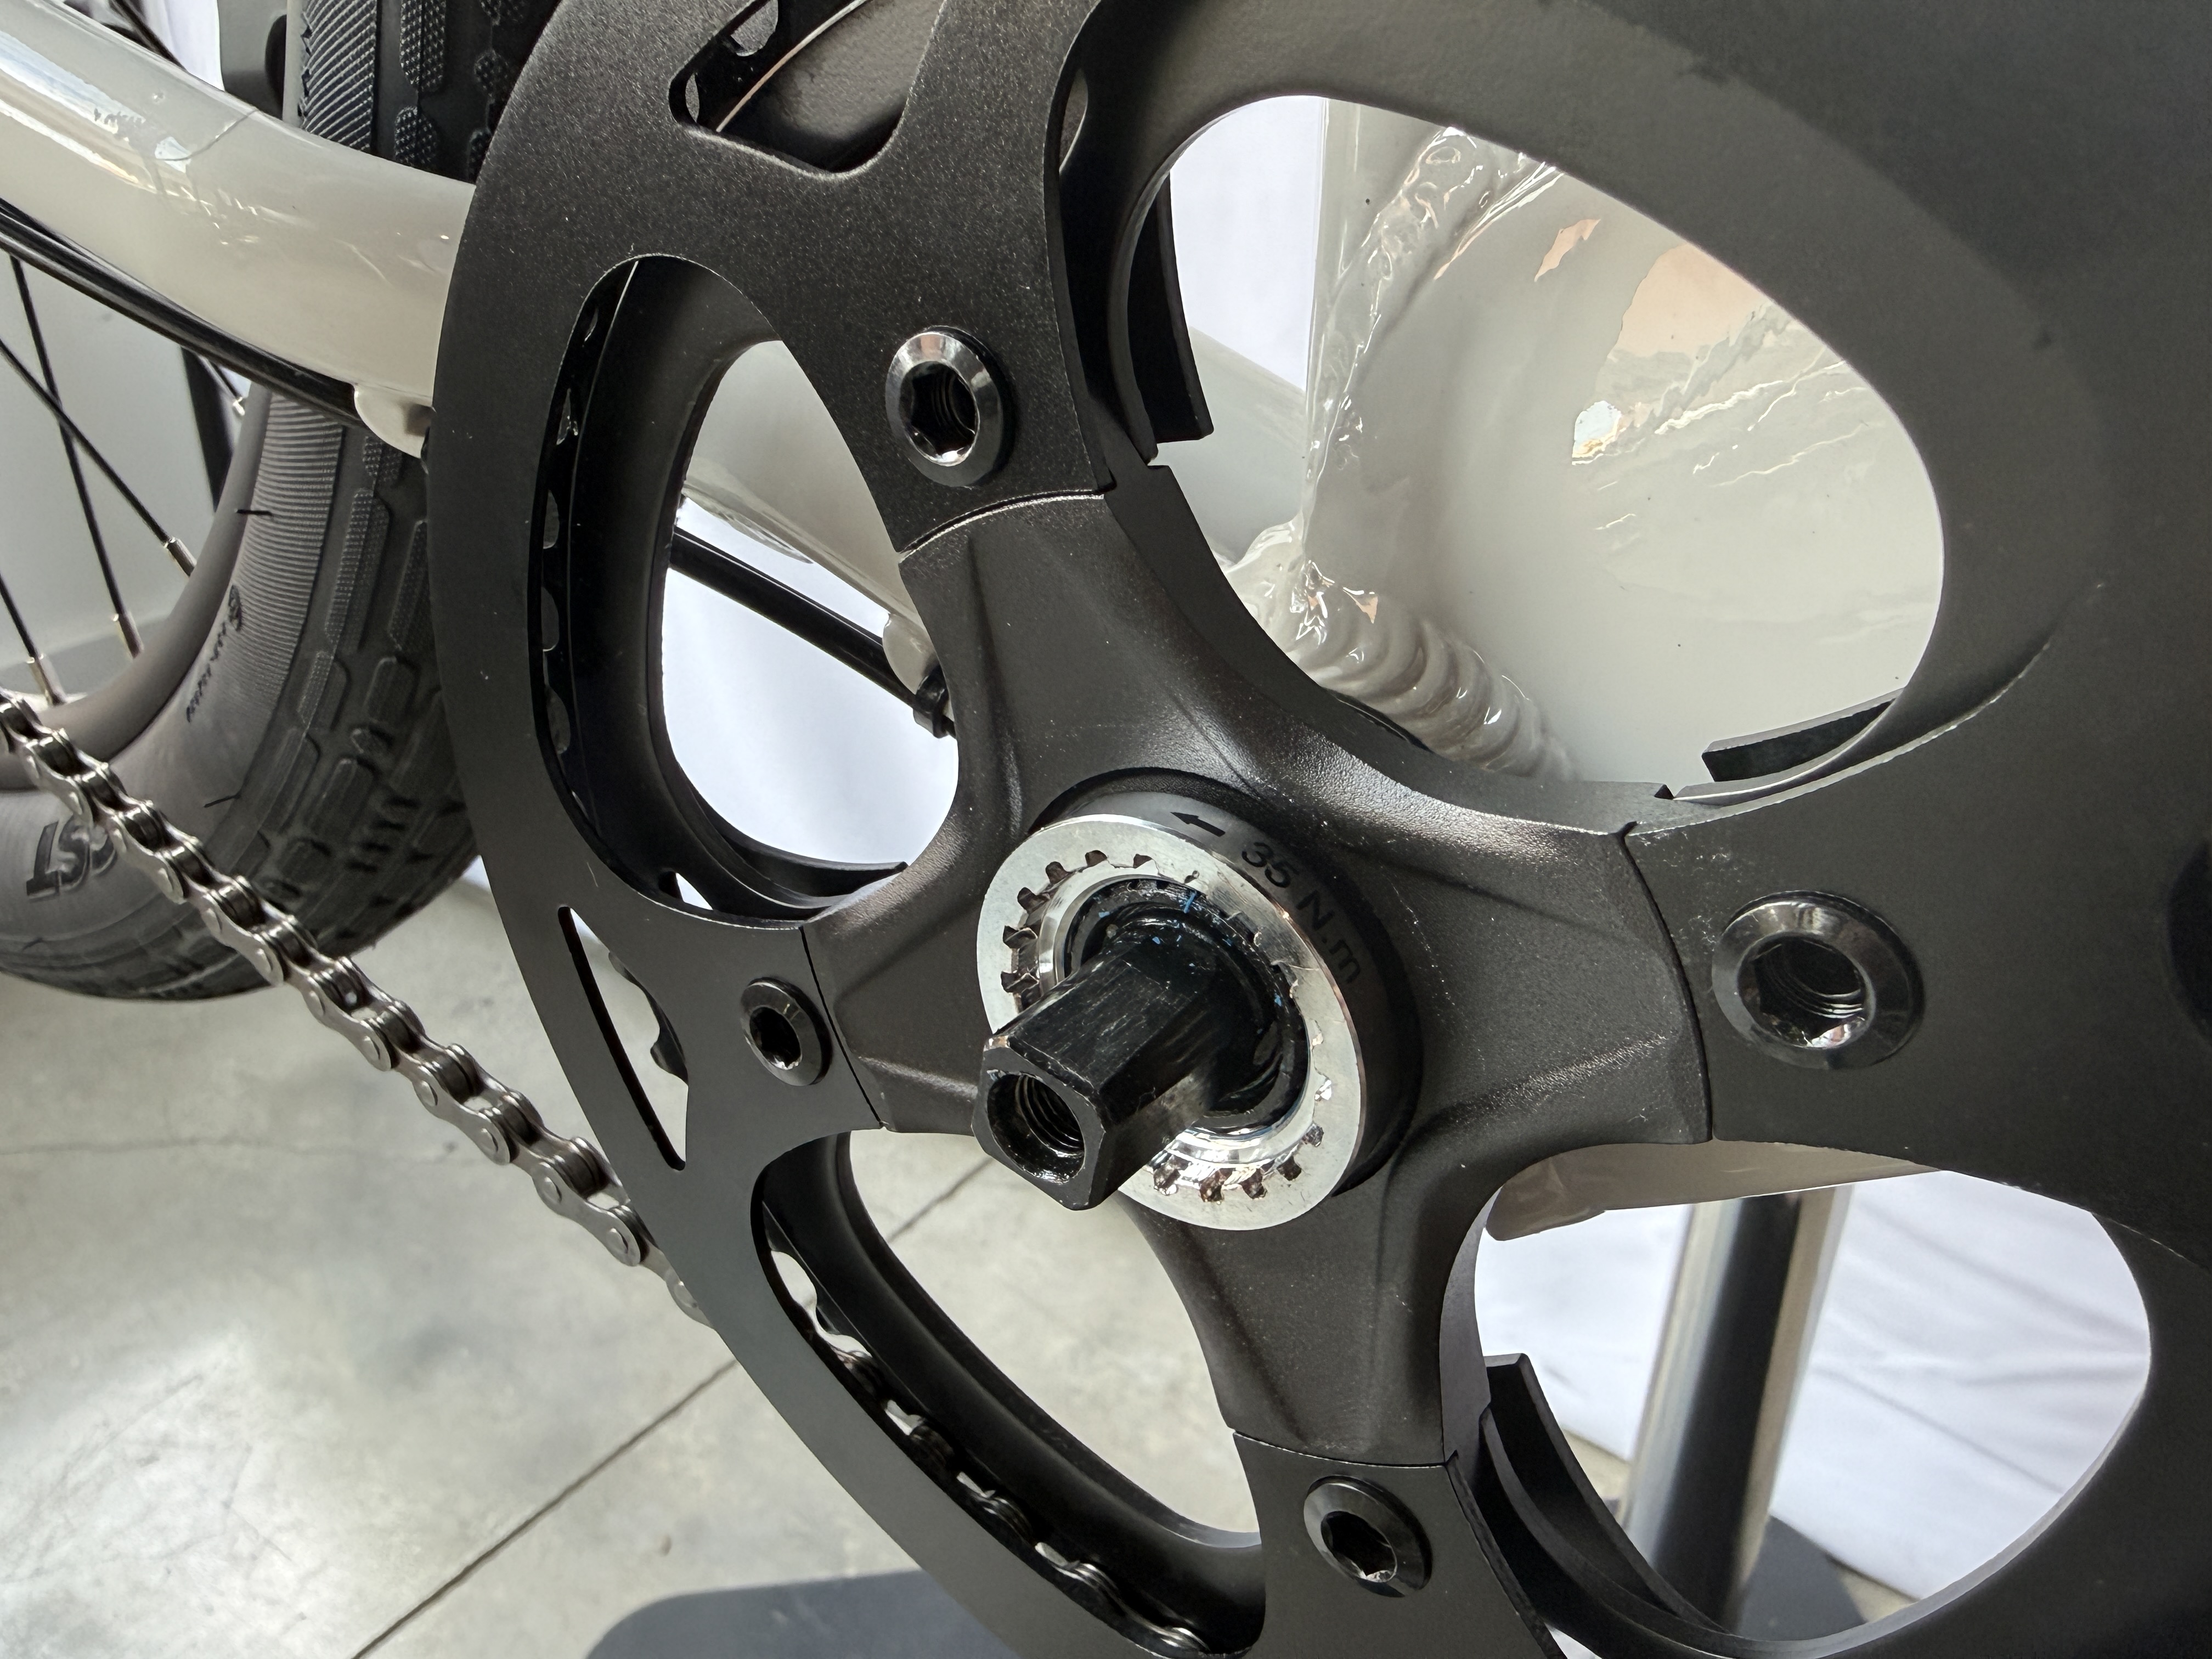
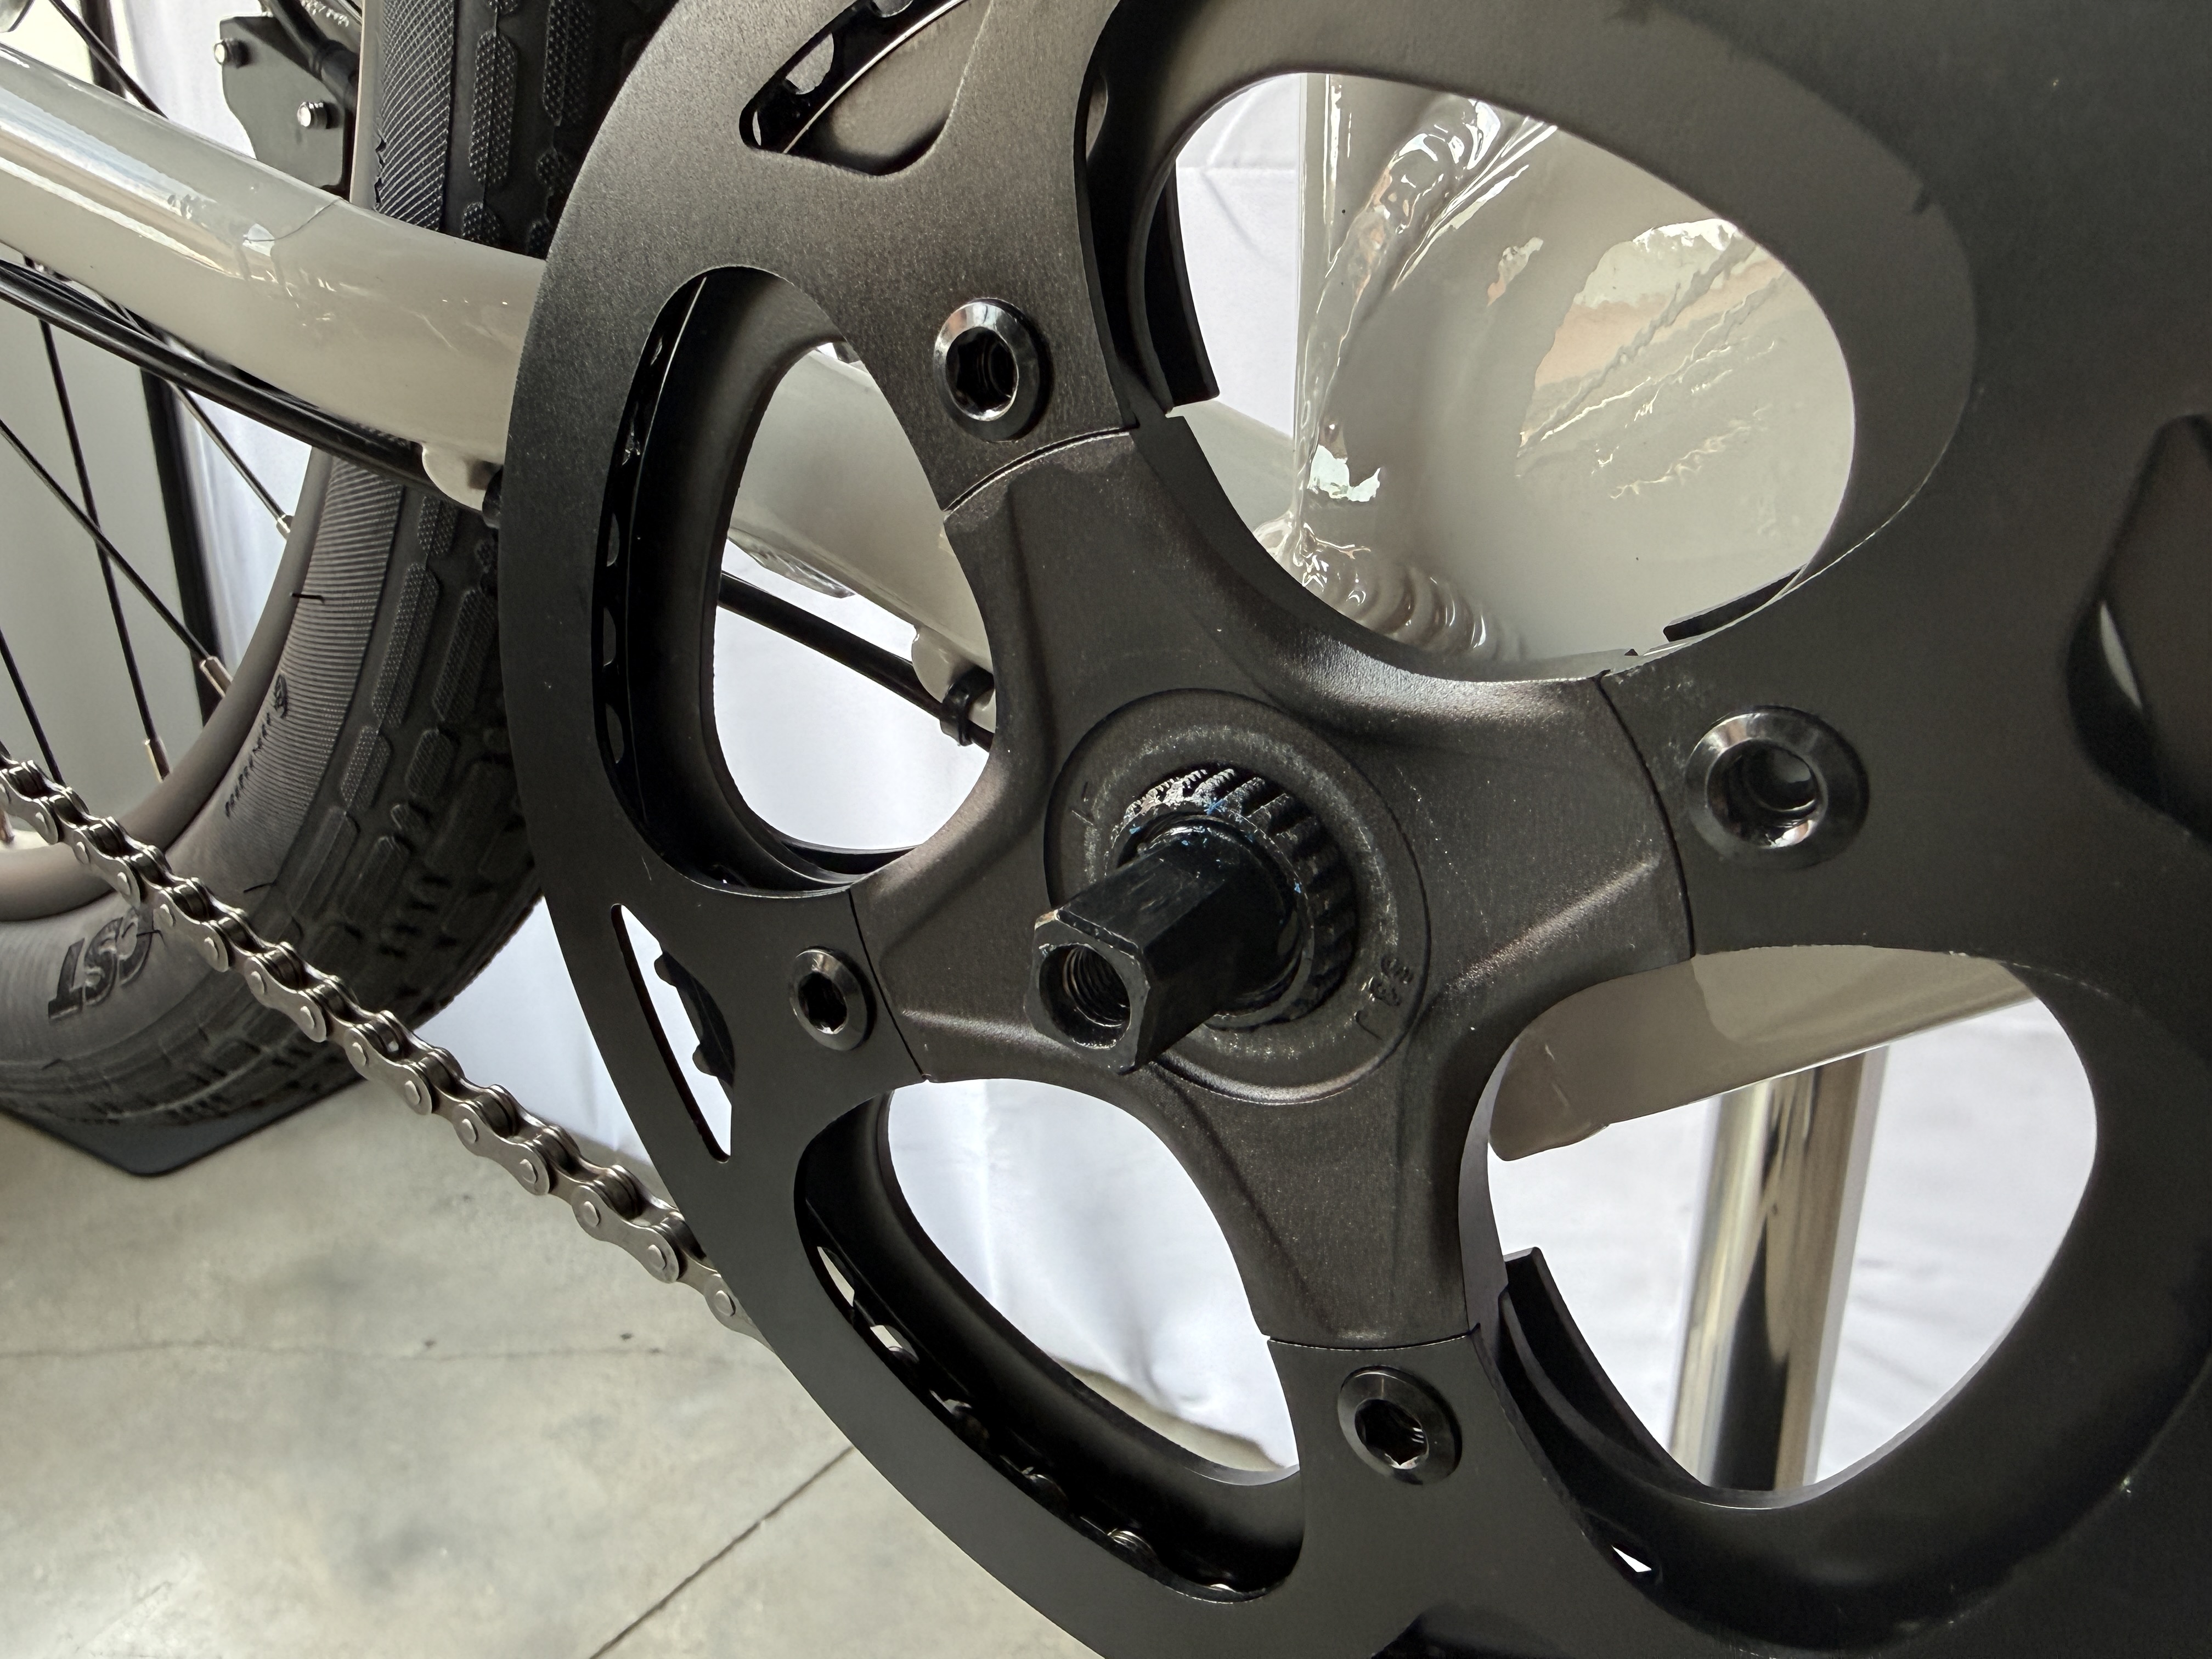
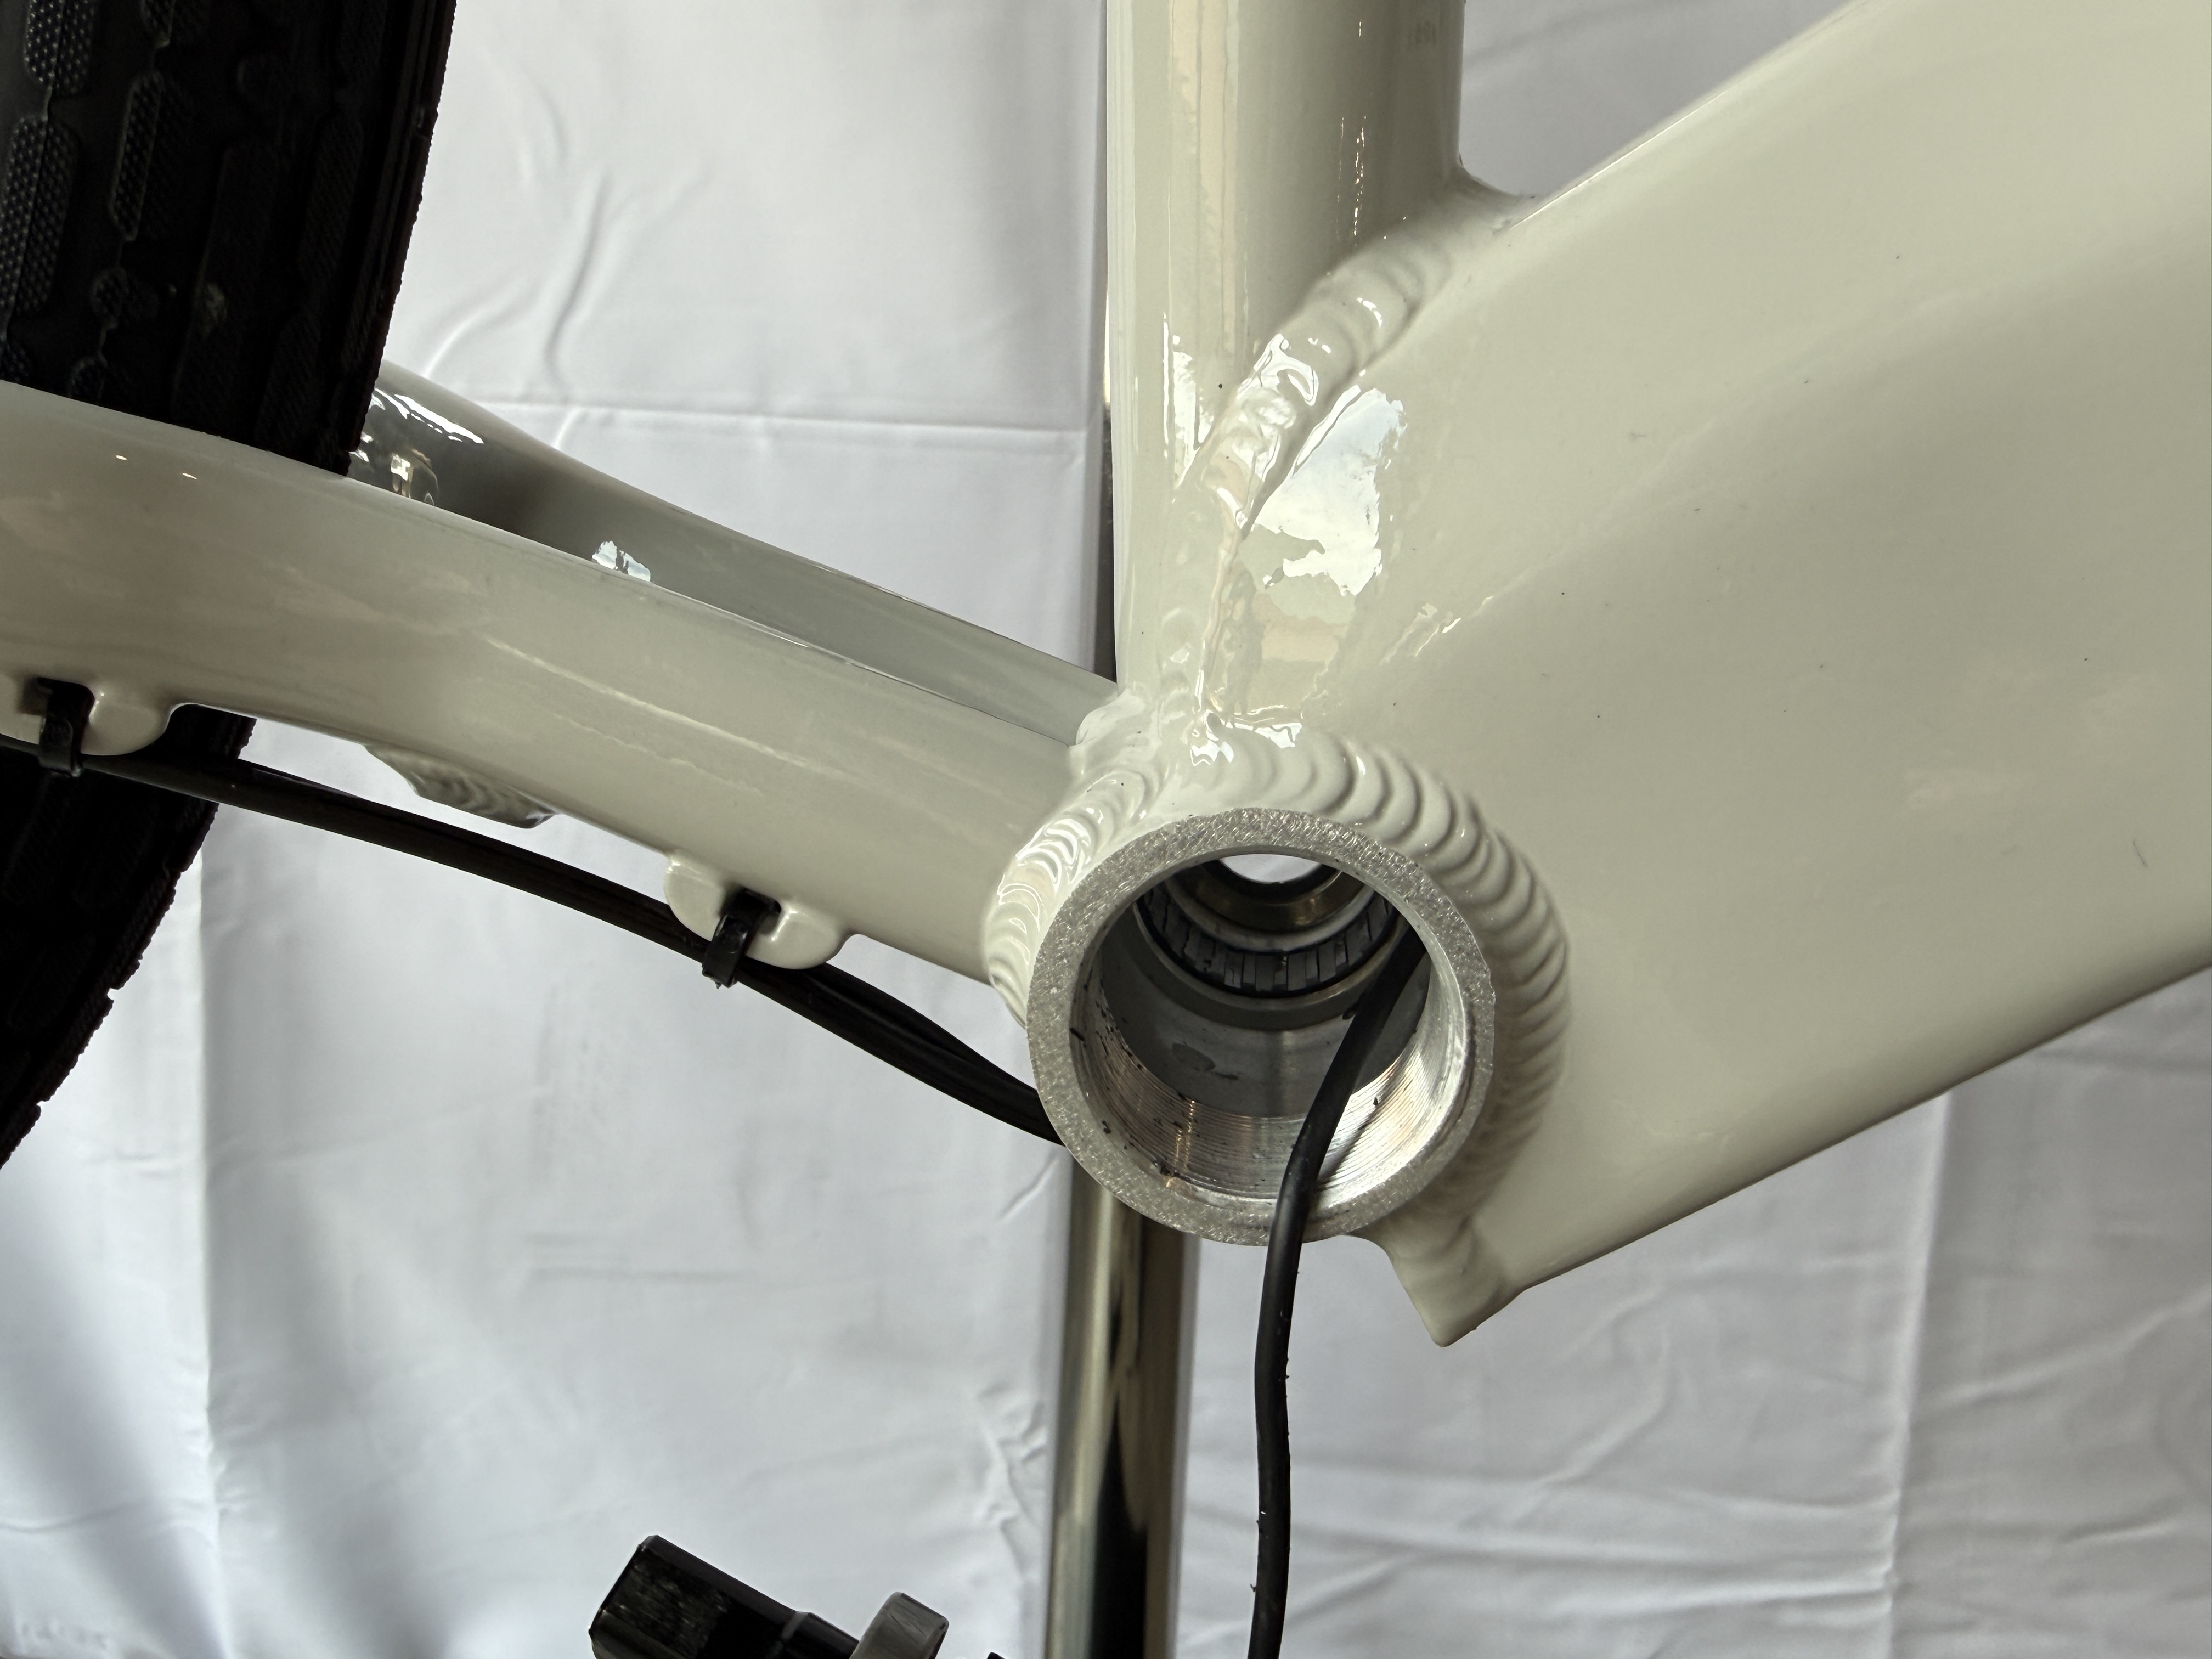
4. Remove the bottom bracket
- Before removing the rear light cable from the seat tube, the bottom bracket must be removed:
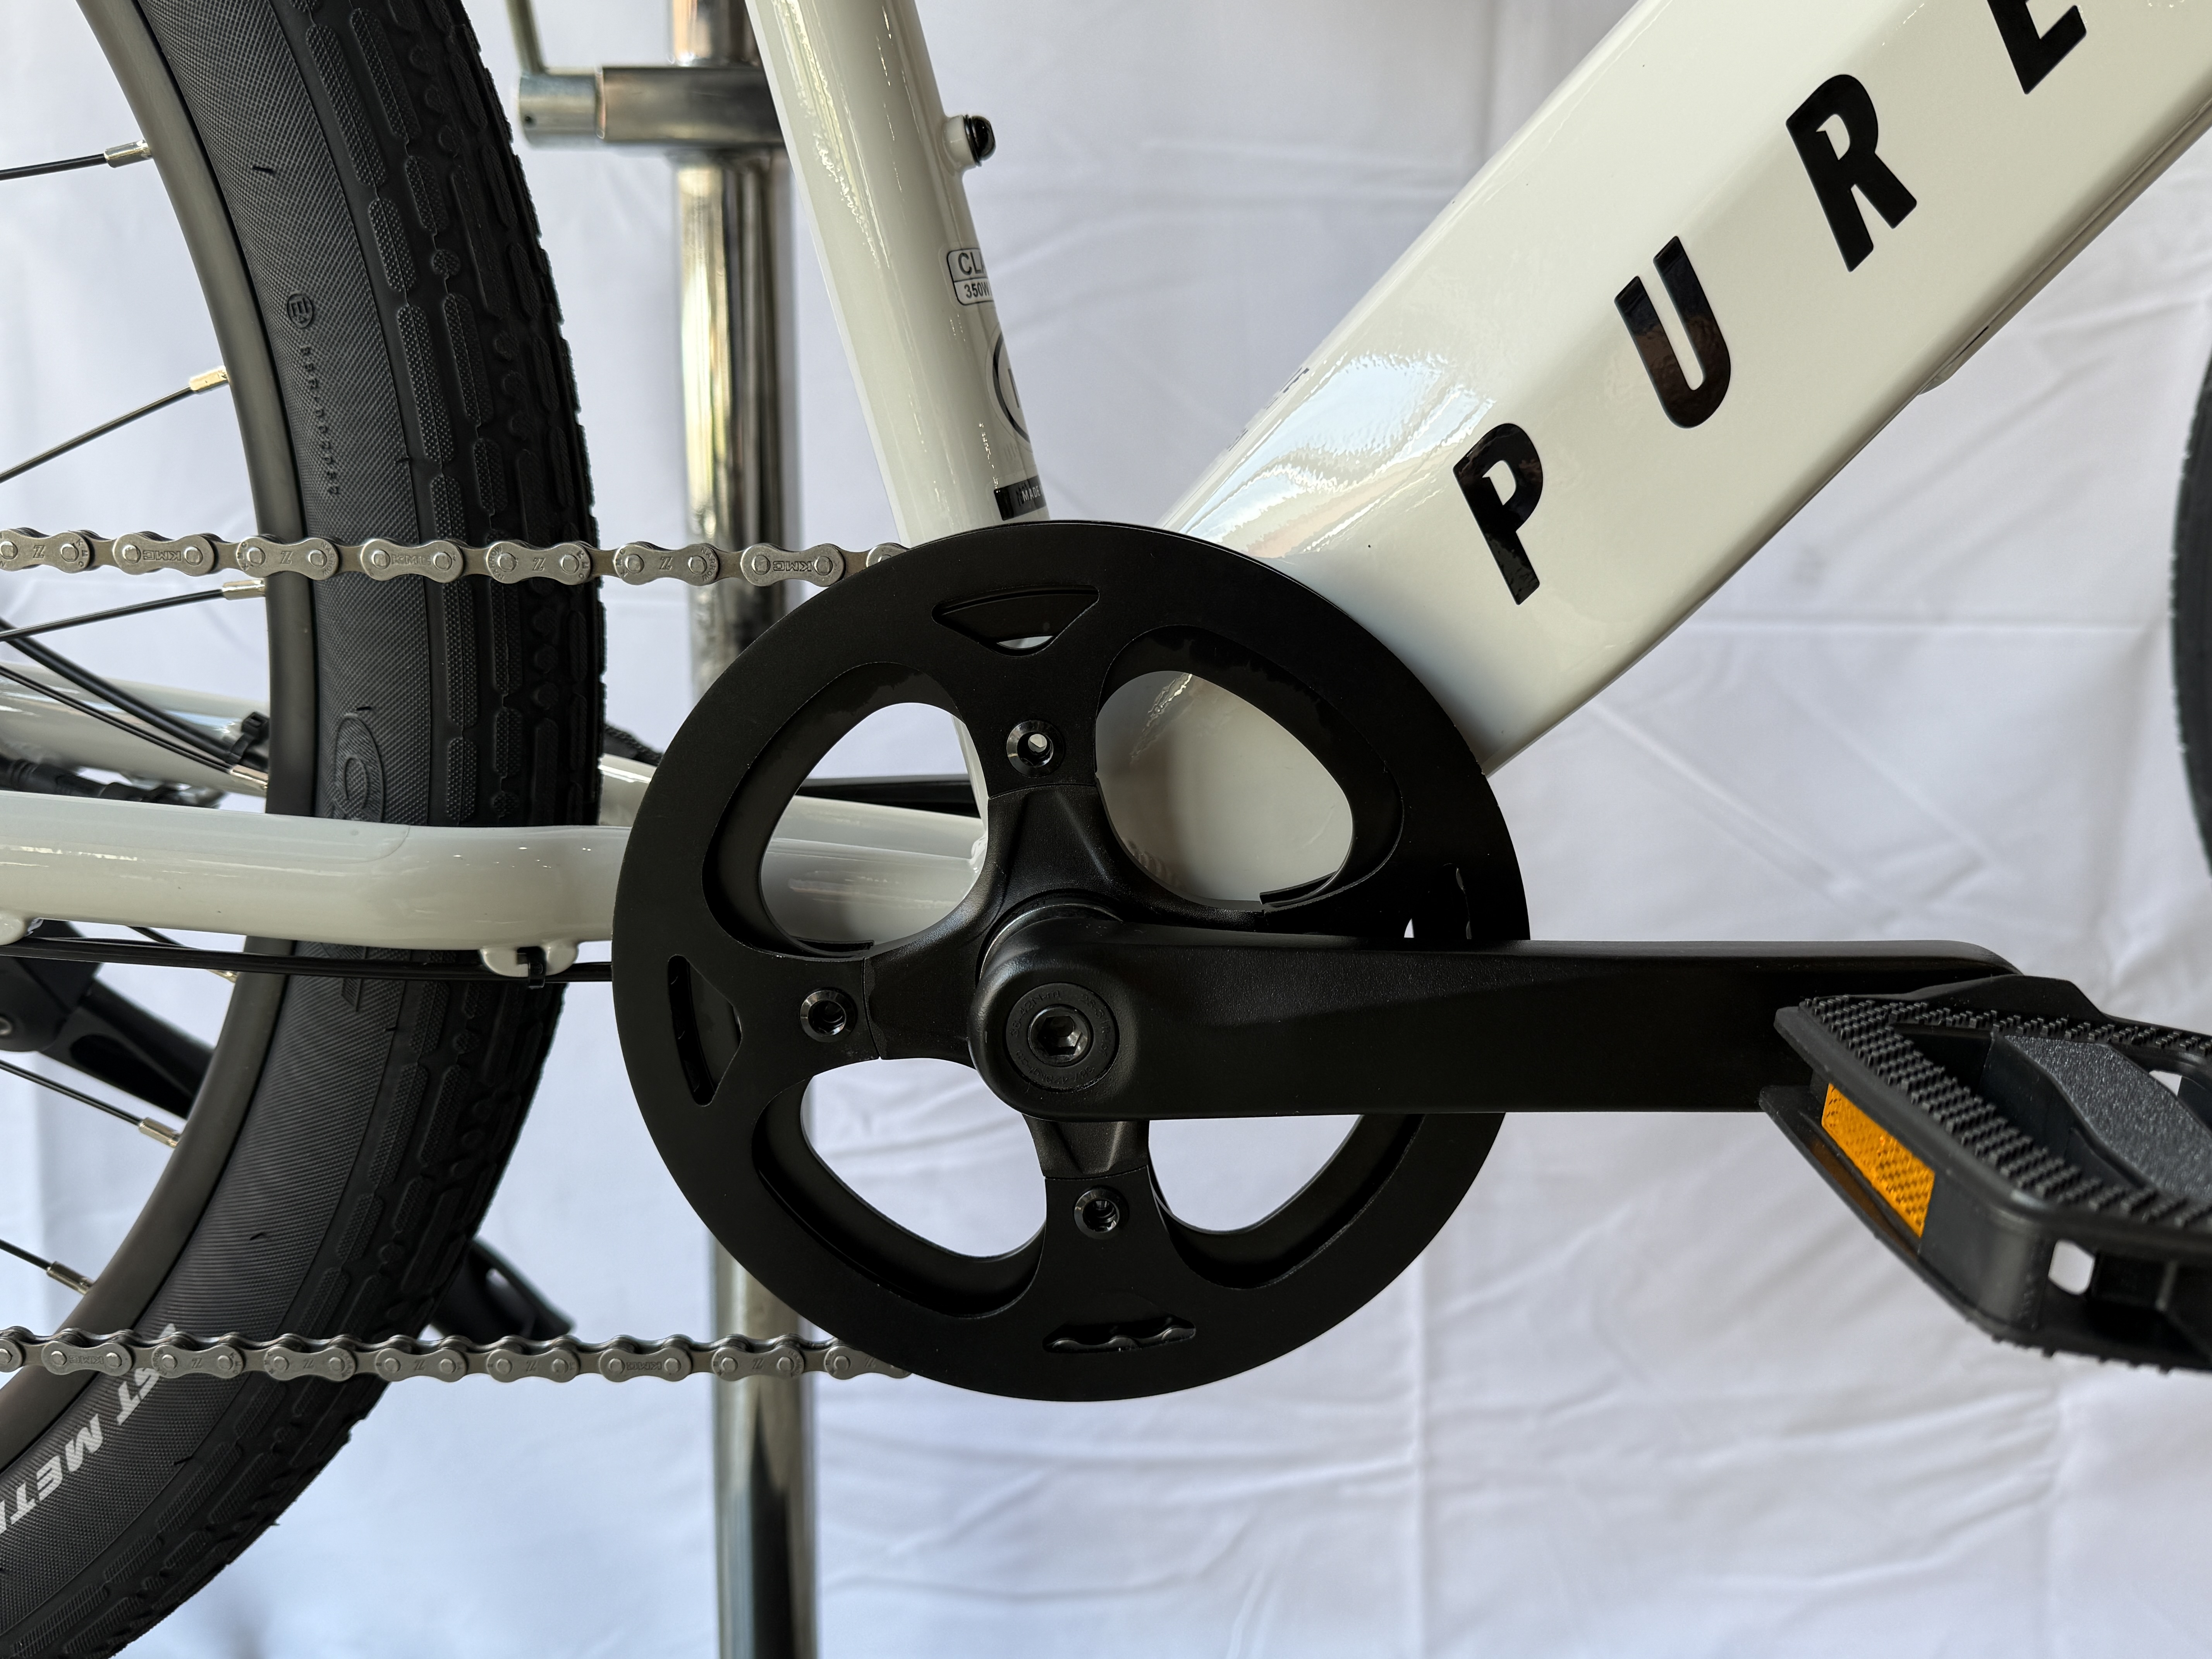
- 1. Using an 8 mm hex wrench, remove the drive-side crank arm bolt.
- 2. With a Park Tool CWP-7 Crank Puller or similar, remove the drive-side crank arm
- 3. Using a Park Tool BBT-22 (20 Spline) B.B. Tool or an equivalent, remove the chainring locking by turning it clockwise. TIP: Secure the non-drive-side crank arm to the chainstay with a heavy duty zip tie. This will keep the crank from rotating and make removing the lockring easier.
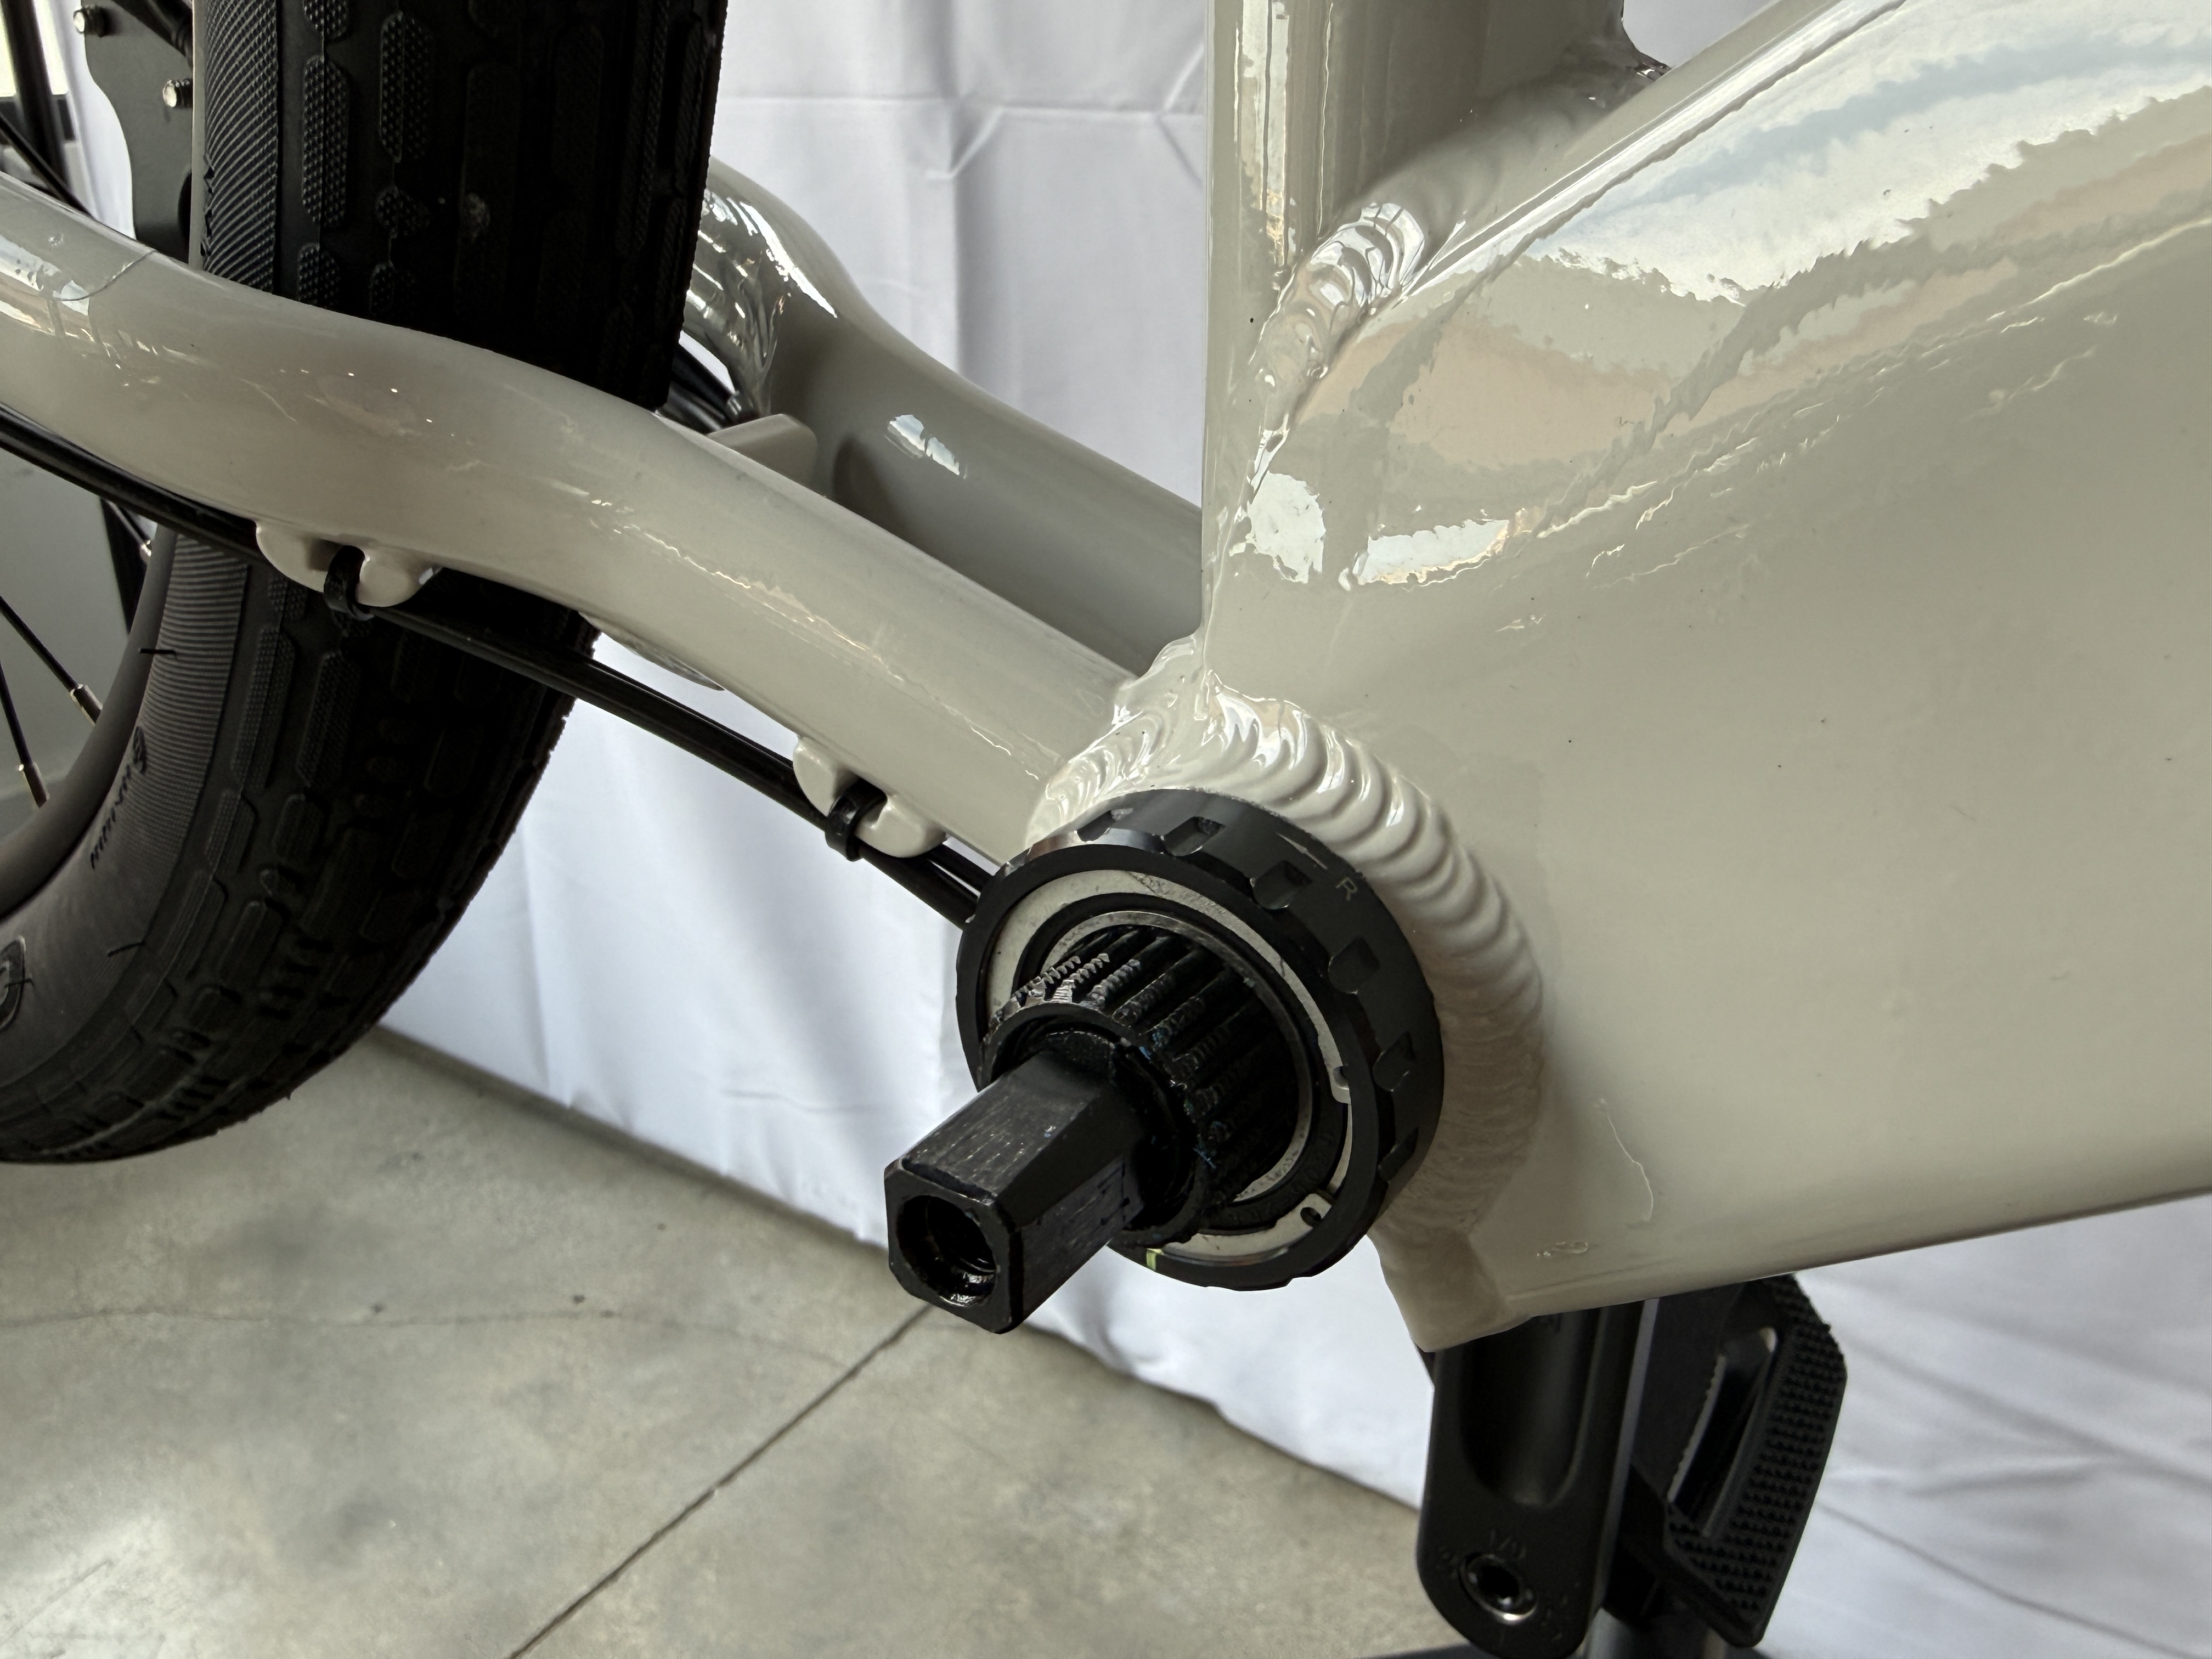
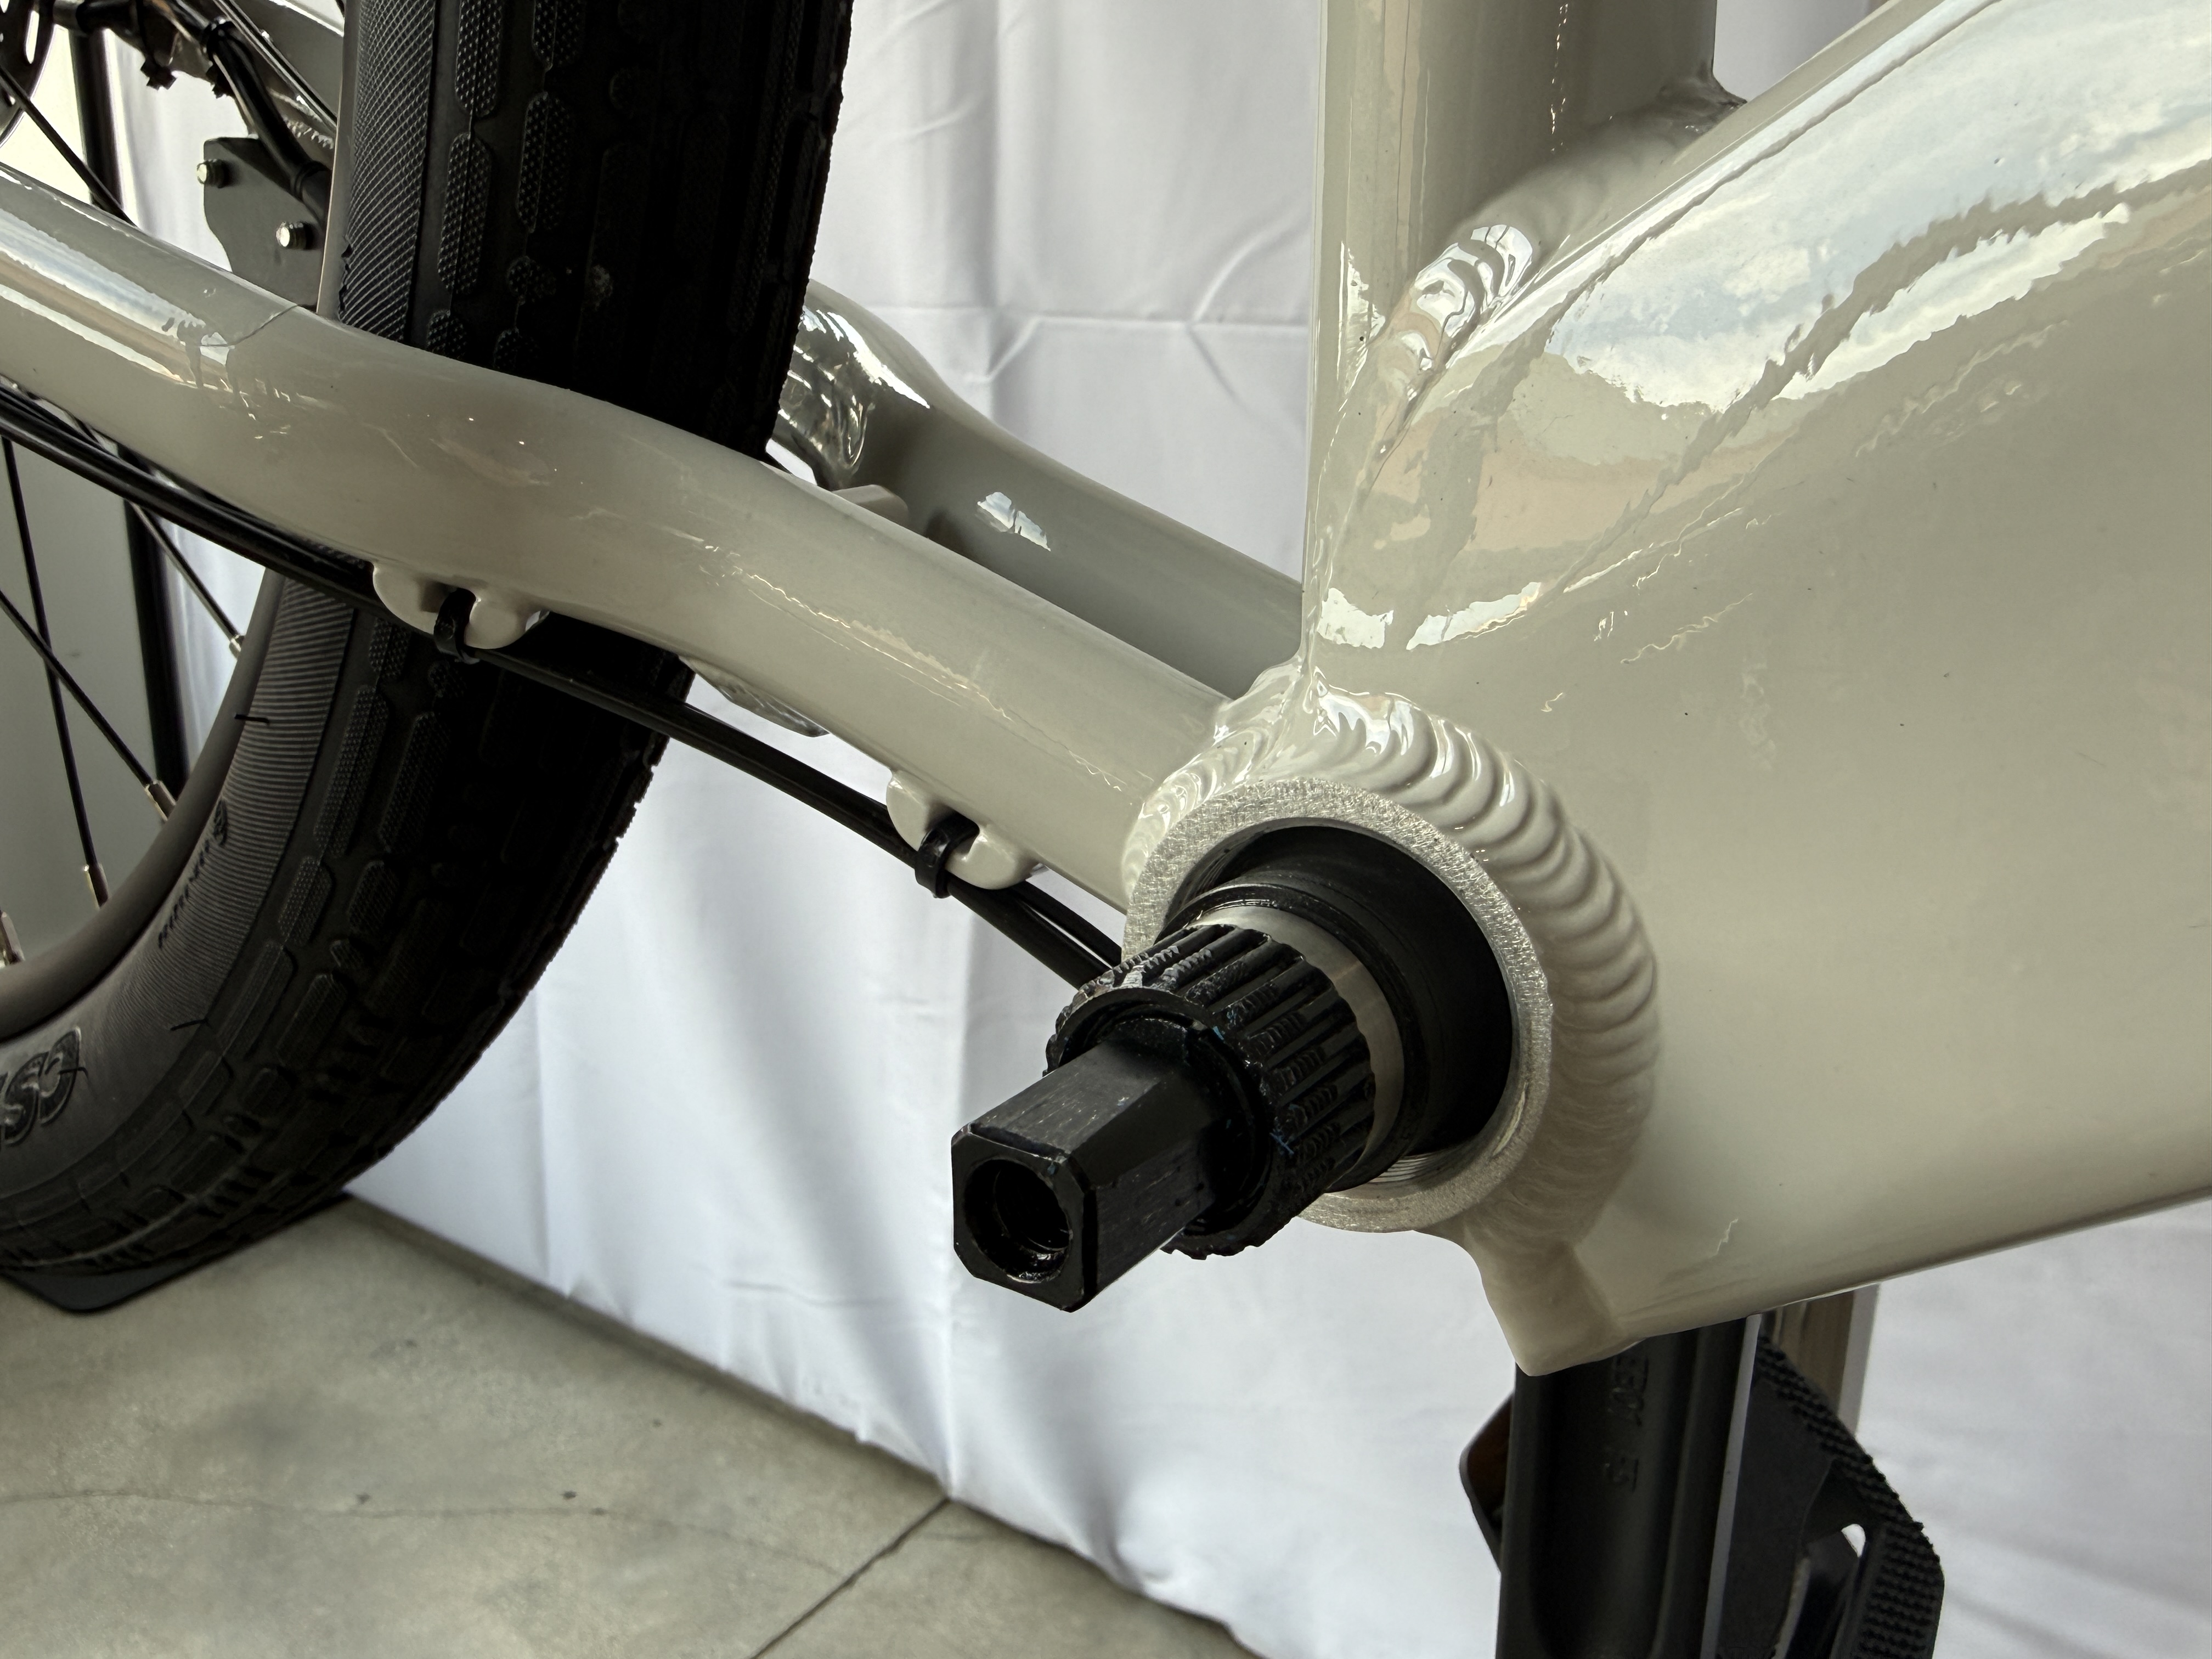
- 4. Using a Park Tool BBT-29 (16 Notch) B.B. Tool or an equivalent, remove the drive side cup by turning clockwise. WARNING: Do not remove the non-drive-side cup while bottom bracket is still installed, as this will damage the wire.
- 5. Carefully slide the bottom bracket out of the frame from the drive side. Take care note to pull too hard or too far, as the cable is connected to the controller. WARNING: Remove only enough to allow the rear light cable to pass freely through the frame.
4. Re-route the rear light cable
- Once you've located the rear light cable, carefully pull it free from the seat tube, then reroute it through the opening directly beneath the bottom bracket shell.
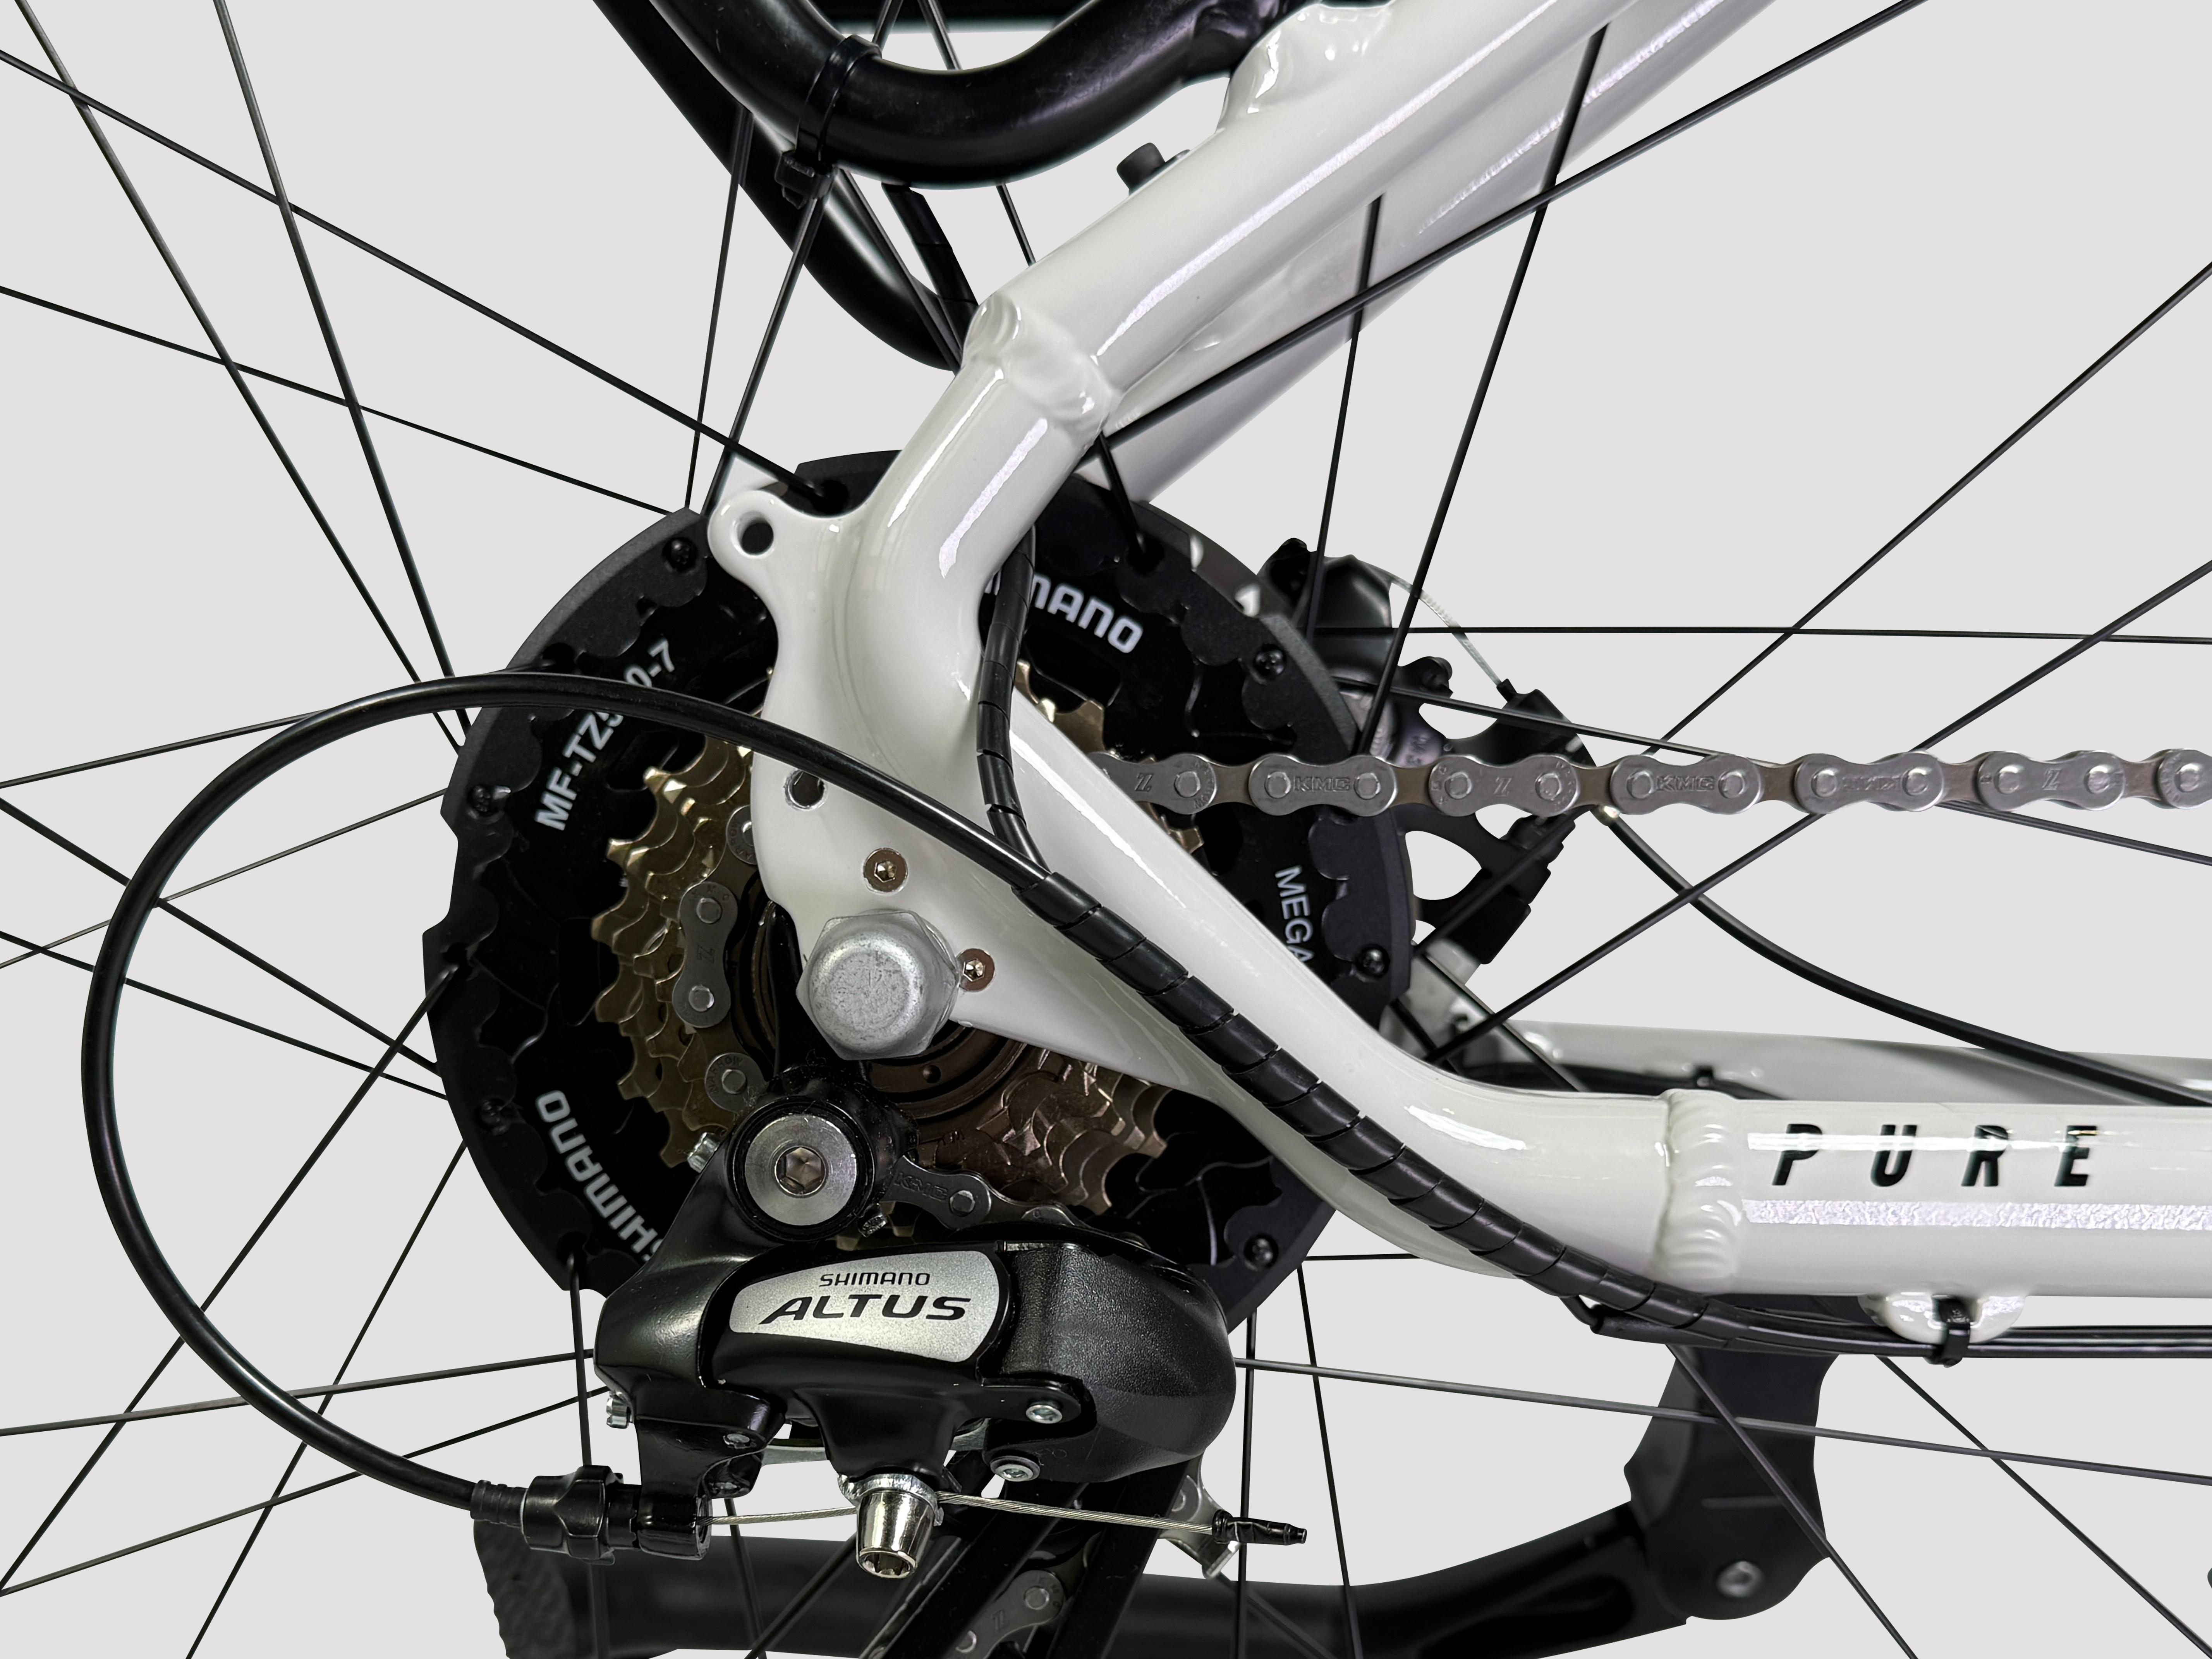
5. Route the rear light cable along the drive-side chainstay.
- Route the rear light cable along the underside of the drive-side chainstay, following the integrated derailleur cable guides. Cut the existing four zip ties and secure the cable with new ones.
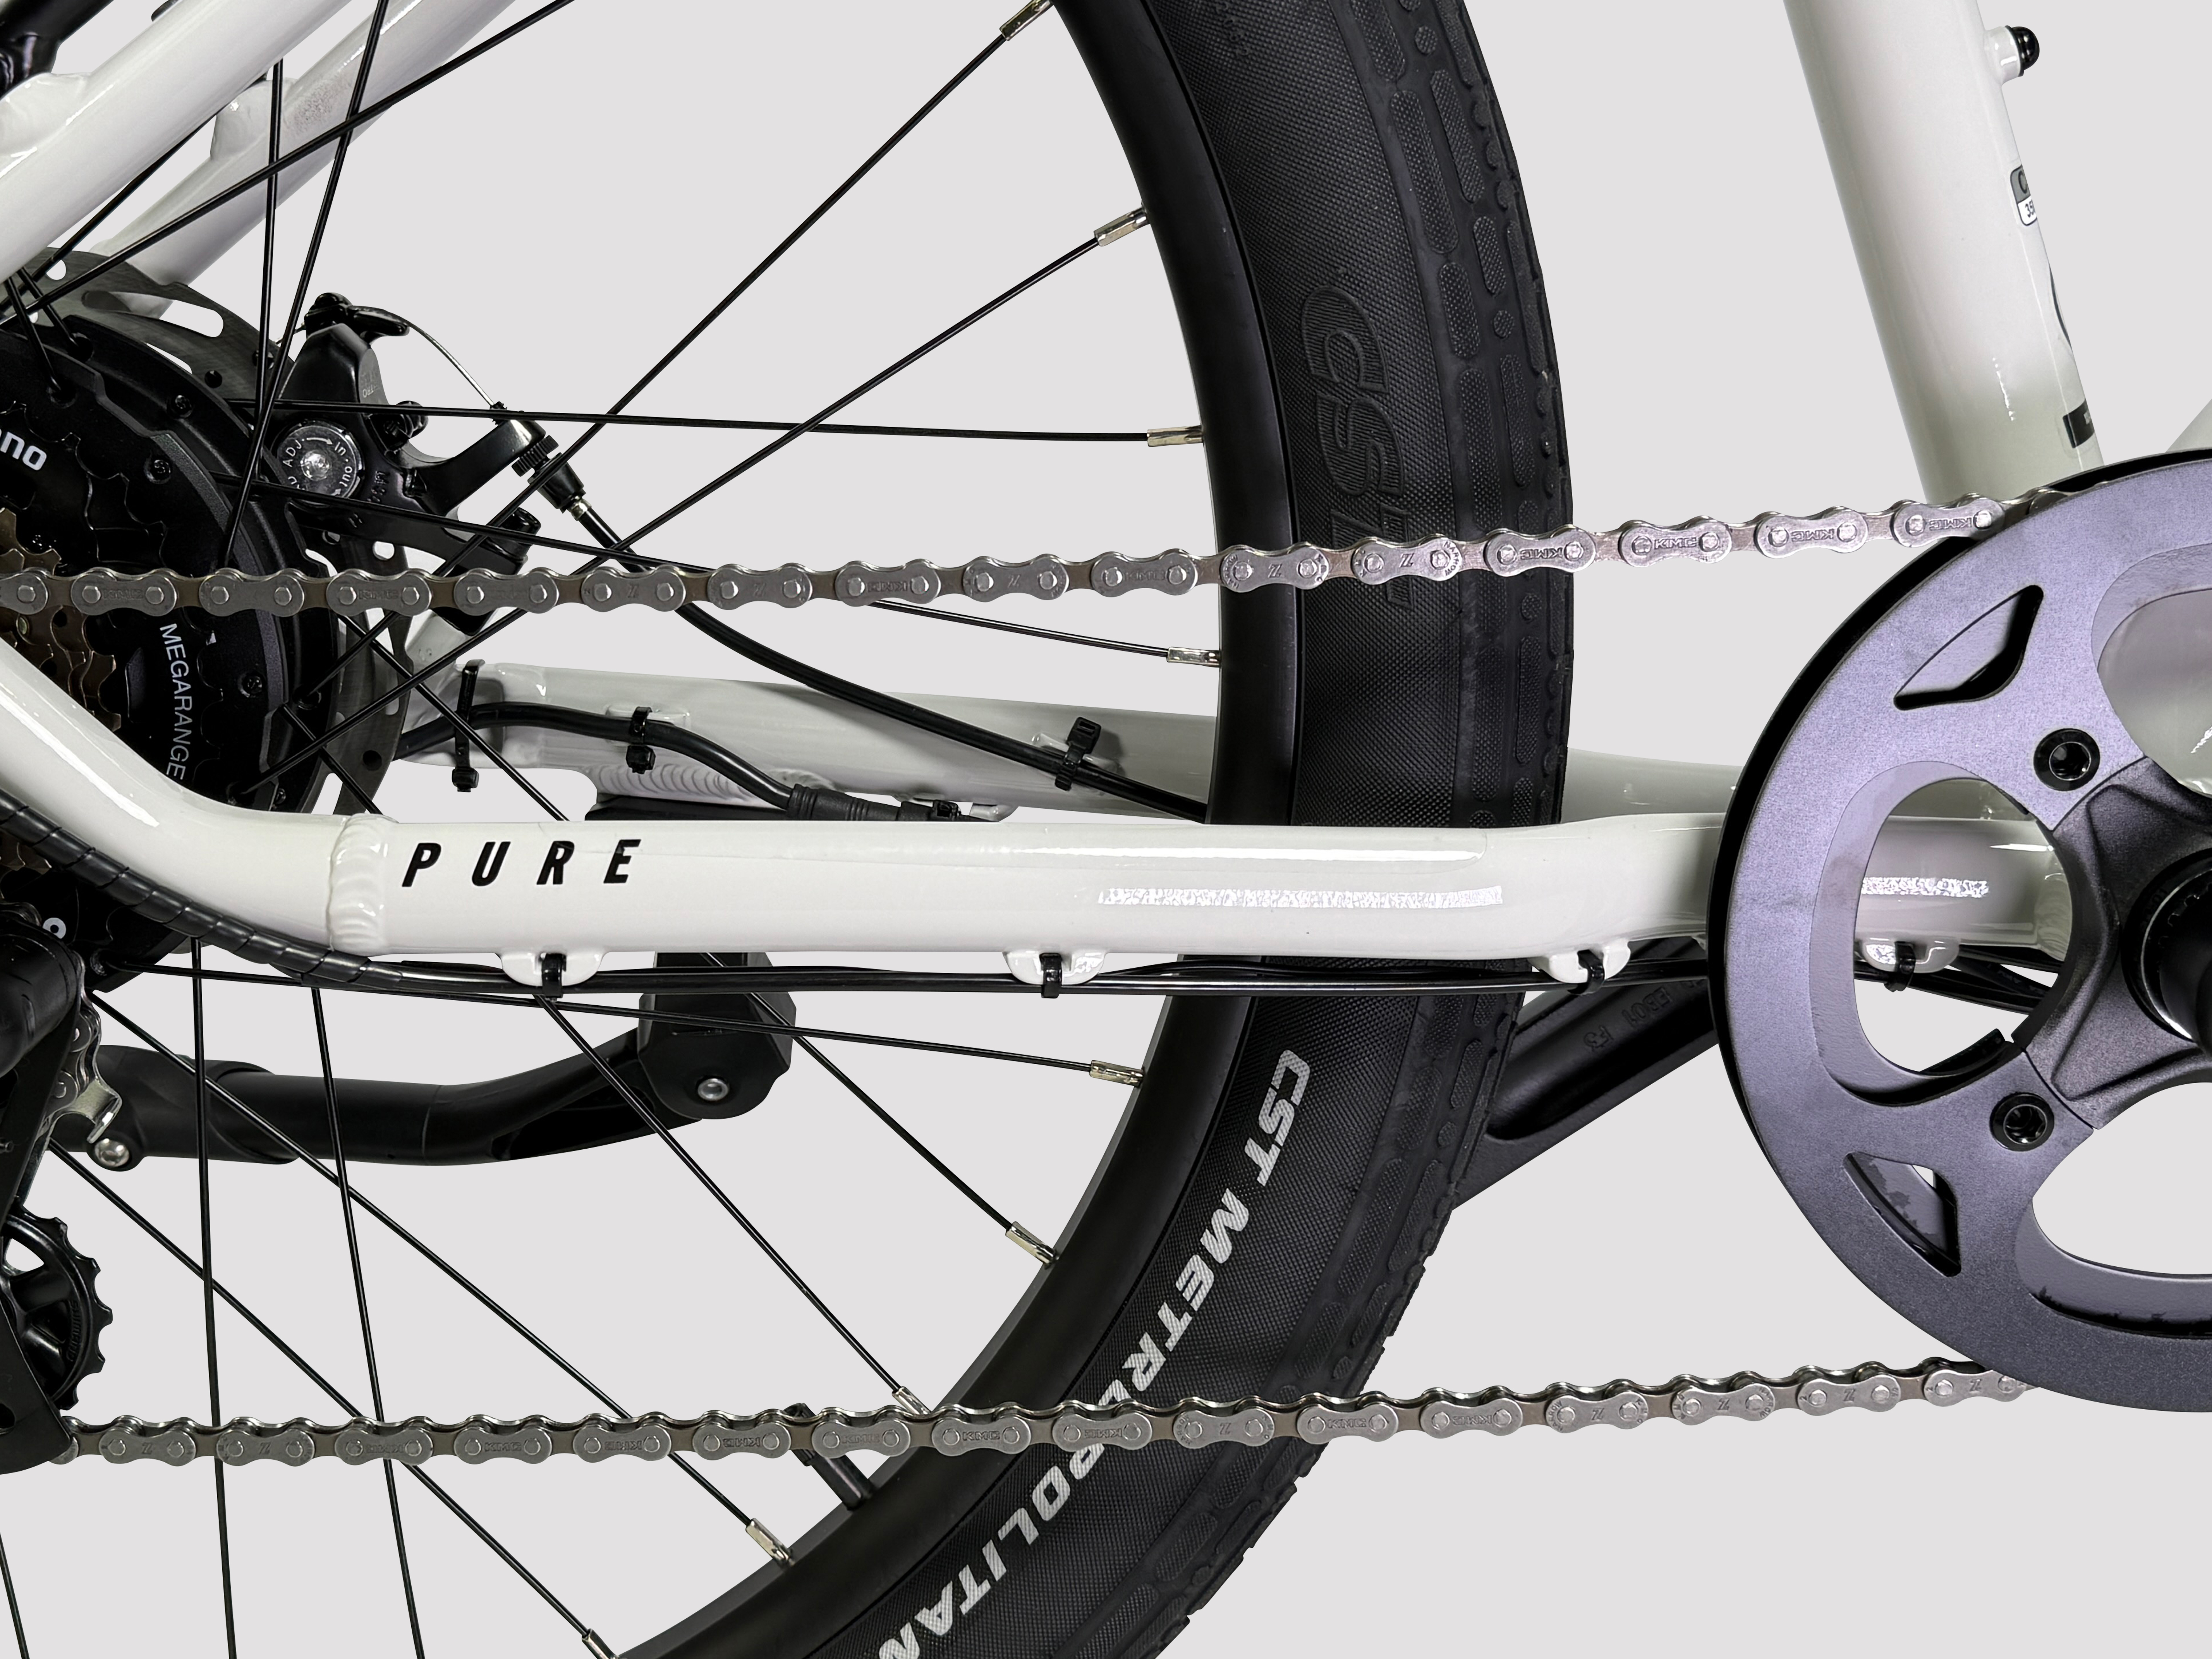
6. Combine the rear light cable with the derailleur cable housing.
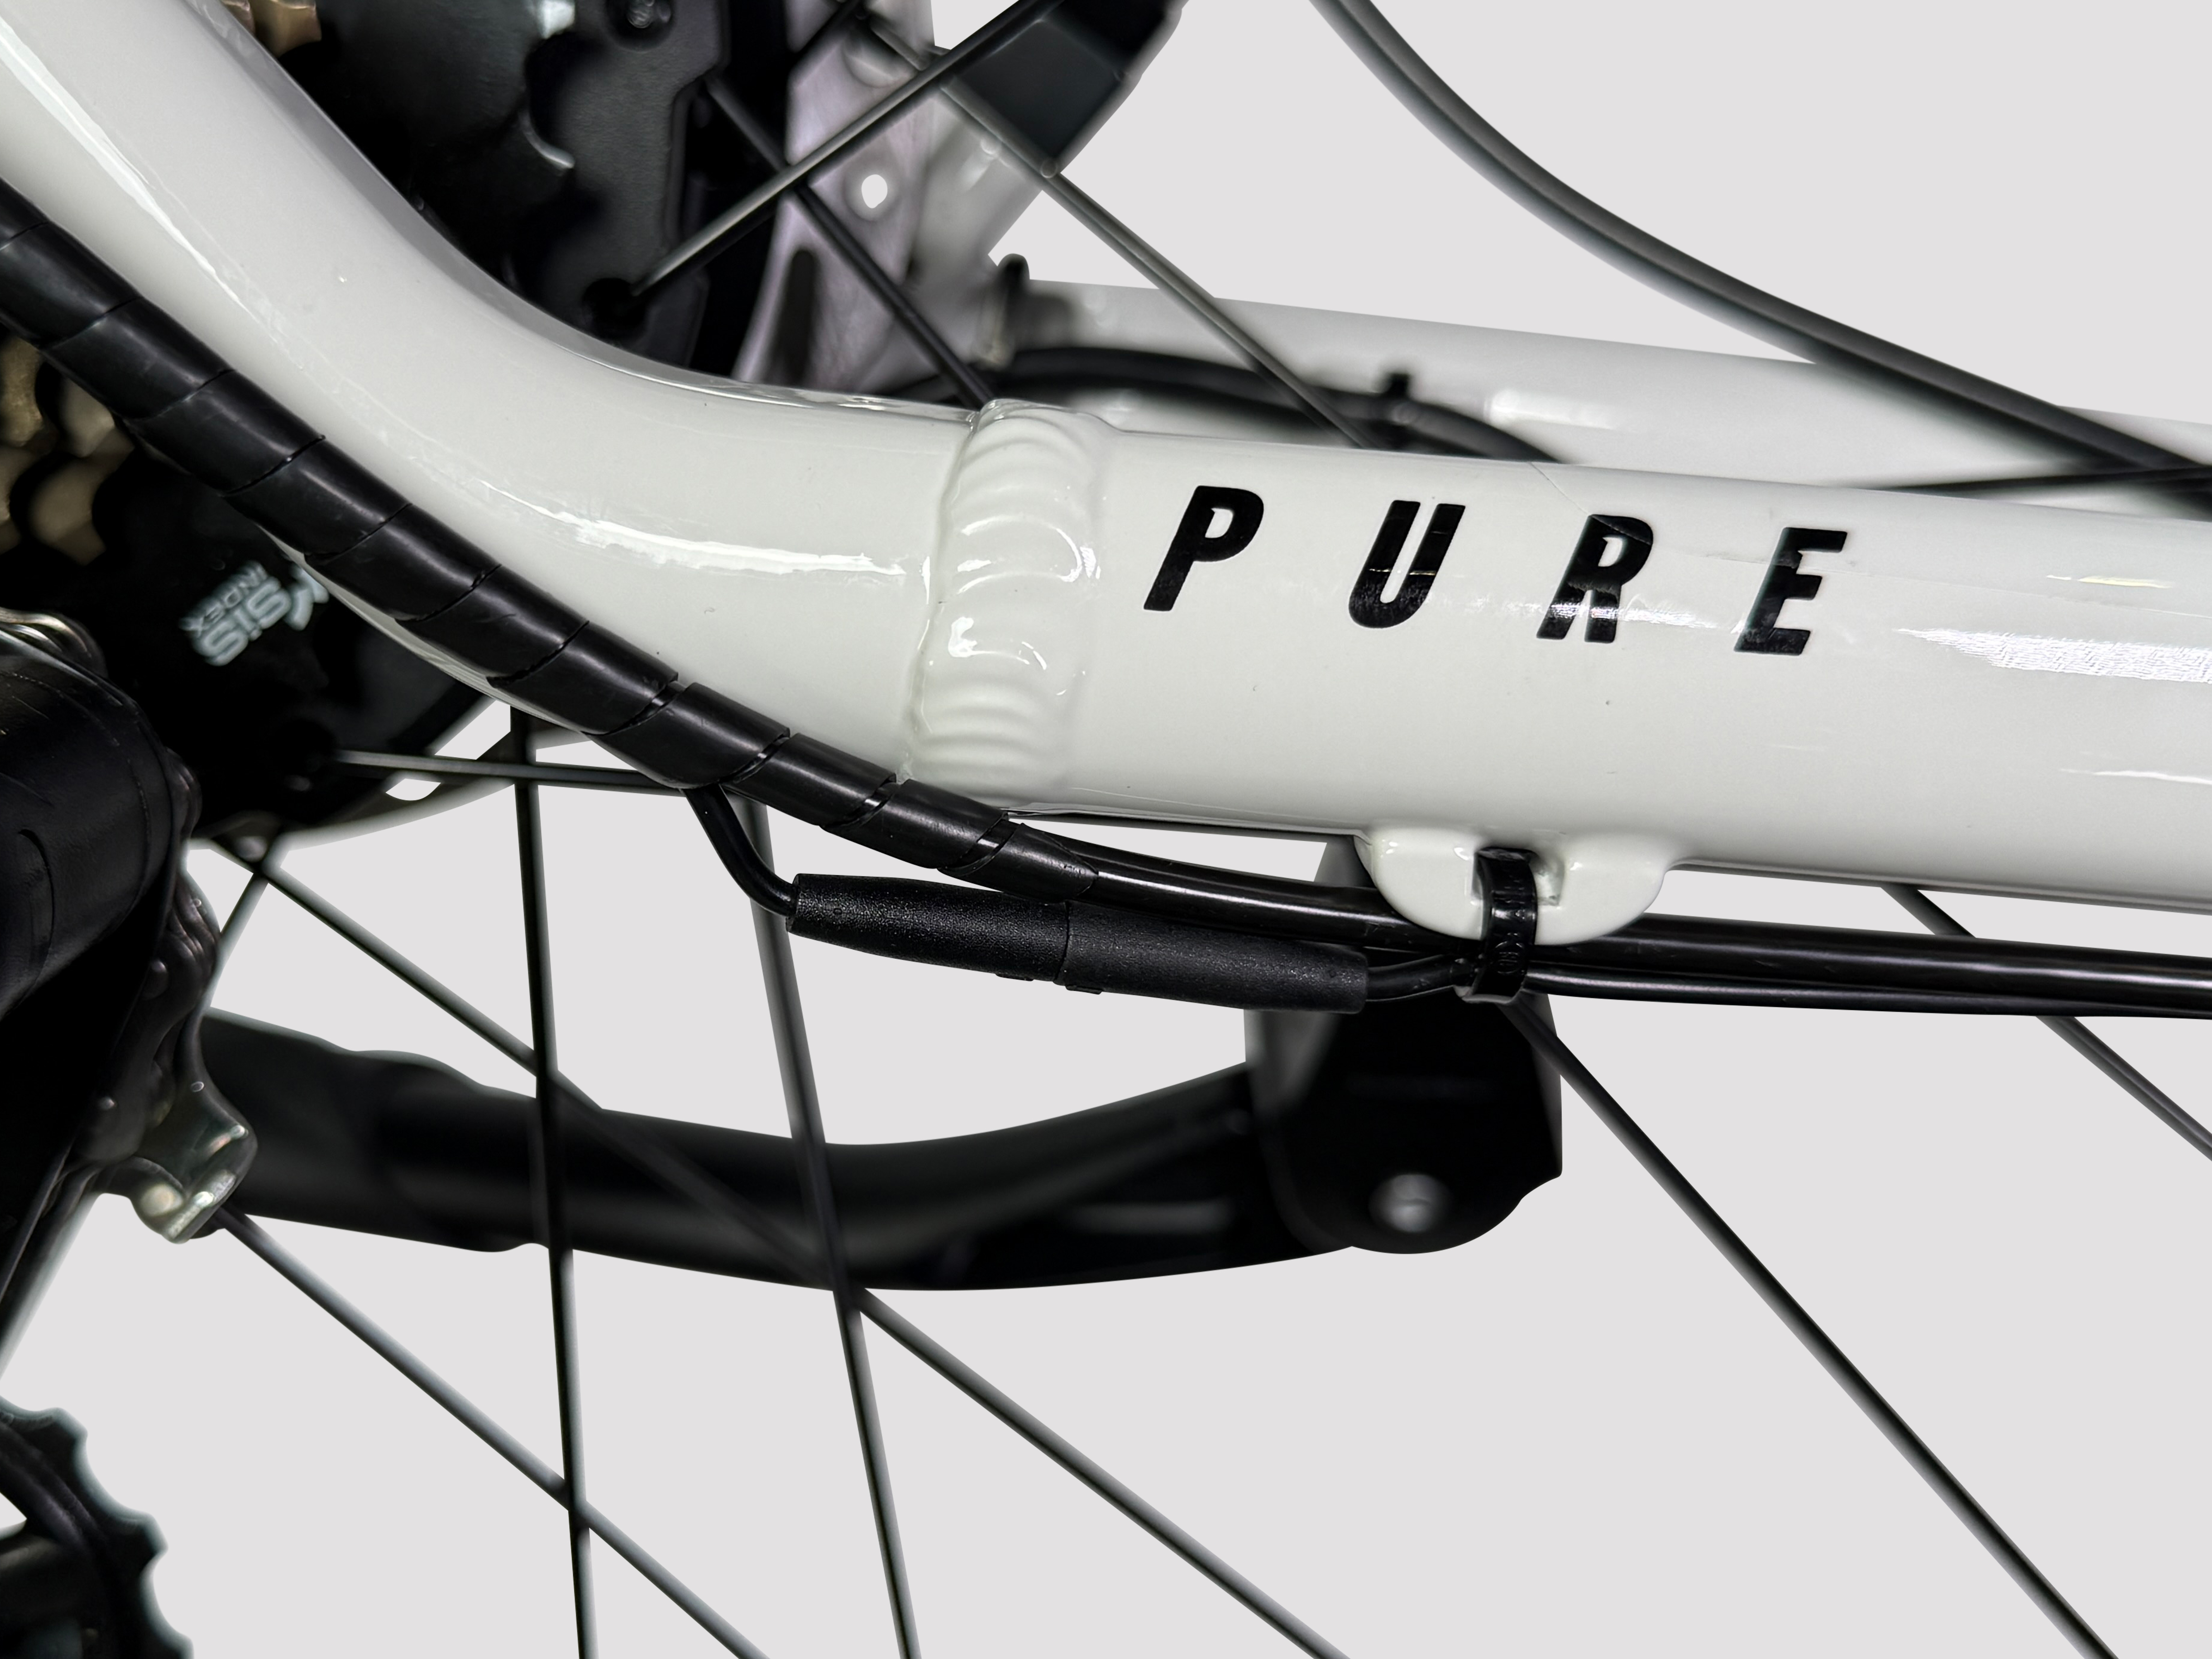
- Use cable management accessory P/N 670881 (or equivalent) to neatly route the rear light cable alongside the derailleur housing and guide it up toward up the rear rack.
- Ensure the rear light cable is routed behind the drive-side dropout to protect it from damage during use. Verify that there is adequate clearance so the cable cannot contact the drivetrain.